Did you know that it’s really important to keep your Cuisinart coffee maker in great condition if you want to always enjoy a delicious cup of coffee? If you really love coffee and use the K-Cup side of your Cuisinart coffee maker a lot, it’s important to know how to clean it properly.
If you don’t take care of your coffee maker, it can affect the taste of your coffee and how well the machine works in the long run. Welcome to this guide where I will provide you with easy-to-follow instructions on how to clean the K-Cup side of your Cuisinart coffee maker.
By following these steps, you will be able to enjoy the delightful aroma and flavor of your favorite brew in every cup. Now, let’s explore the straightforward yet essential cleaning routine that will ensure your coffee maker remains in excellent condition.
Why Cleaning a Cuisinart Coffee Maker is Important
Maintains The Taste And Quality Of Coffee
A clean coffee maker is essential for preserving the flavor and aroma of your coffee. Over time, oils and mineral deposits from the coffee beans can accumulate in the brewing system, affecting the taste and quality of each cup. By regularly cleaning your Cuisinart Coffee Maker, you can remove these residues and ensure that your coffee tastes fresh and delicious every time.
Prevents Clogging And Malfunctioning
Clogging is a common issue in coffee makers that are not properly cleaned. When coffee grounds and other debris build up in the machine, they can block the water flow and result in clogs. This not only affects the brewing process but can also lead to malfunctions and breakdowns. By regularly cleaning your Cuisinart Coffee Maker, you can prevent clogging and ensure that your machine operates smoothly and efficiently.
Extends The Lifespan Of The Coffee Maker
Proper maintenance and cleaning can significantly extend the lifespan of your Cuisinart Coffee Maker. By removing mineral deposits, descaling the machine, and keeping it free from debris, you can prevent damage and ensure that all components function properly. A well-maintained coffee maker not only produces better-tasting coffee but can also save you money in the long run by avoiding expensive repairs or the need for a replacement.
Step-by-step Guide For Cleaning The Cuisinart Coffee Maker K Cup Side
Cleaning your coffee maker regularly is crucial to ensure the best-tasting coffee and to prolong its lifespan. In this guide, we will walk you through the entire process, from gathering the necessary supplies to reassembling your coffee maker and getting it ready for brewing again.
Gather The Necessary Supplies
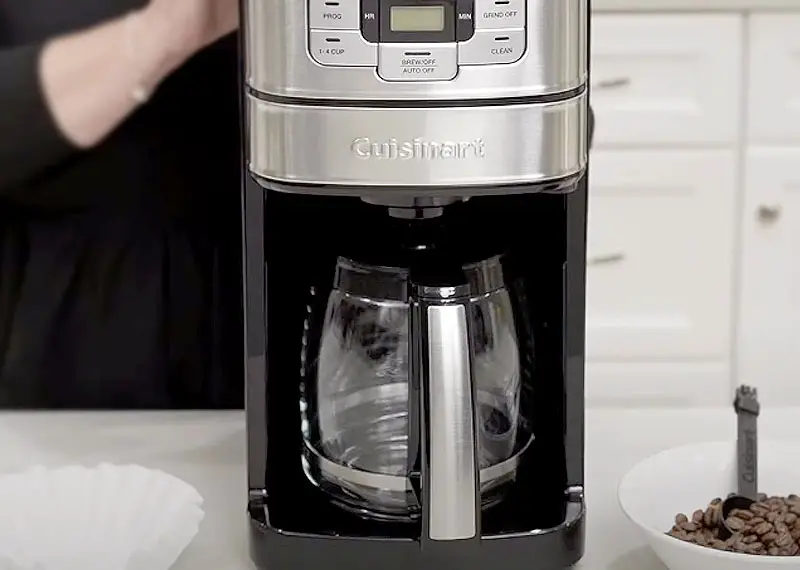
Before you begin cleaning your Cuisinart coffee maker, make sure you have the following supplies on hand:
- Warm water
- Mild dish soap
- Clean, lint-free cloth or sponge
- White vinegar or descaling solution
- Empty sink or basin
Prepare the Coffee Maker
Start by unplugging your Cuisinart coffee maker from the power source. For safety reasons, it’s essential to ensure the machine is not connected to any electrical outlet during the cleaning process. Next, remove any remaining coffee or used K Cups from the coffee maker.
Clean the Removable Parts
Dismantle the removable parts of your Cuisinart coffee maker, such as the water reservoir, K Cup holder, and drip tray. Rinse these parts thoroughly under running warm water to remove any coffee grounds or residue. Use a mild dish soap and a sponge or cloth to clean the parts gently. Rinse again and pat dry with a clean cloth.
Clean the Brewer Unit
To clean the brewer unit, dampen a clean cloth or sponge with warm water and mild dish soap. Gently wipe the brewer unit to remove any coffee oils or stains. Pay extra attention to the opening where the K Cup goes, as it can accumulate build-up. Rinse the cloth or sponge and wipe the brewer unit again to remove any soap residue. Pat dry with a clean cloth.
Descale the Coffee Maker
Descaling is an essential step in keeping your Cuisinart coffee maker in optimal condition. Fill the water reservoir with a mixture of equal parts white vinegar and water or follow the descaling solution instructions. Place an empty mug or carafe on the drip tray. Start a brew cycle without inserting a K Cup, allowing the vinegar or descaling solution to run through the machine. Repeat this process until the water reservoir is empty.
Rinse and Dry the Coffee Maker
After descaling, flush the coffee maker by running a brew cycle with just water. This will remove any lingering vinegar or descaling solution. Fill the water reservoir with clean water and run a second brew cycle. Repeat this process once more to ensure all traces of vinegar or descaling solution are eliminated. Finally, dry all removable parts and the brewer unit with a clean cloth.
Reassemble and Start Brewing Again
Once everything is dry, reassemble your Cuisinart coffee maker by placing the cleaned removable parts back into their respective positions. Make sure everything fits securely. Plug the coffee maker back into the power source. Your Cuisinart coffee maker is now clean and ready to brew your favorite cup of coffee again! Enjoy the fresh and delicious taste of a well-maintained machine.
Tips and Best Practices for Cleaning
Keeping your Cuisinart Coffee Maker K Cup Side clean is essential for maintaining the quality and taste of your coffee. Regular cleaning not only ensures a better brewing experience but also extends the lifespan of your coffee maker. In this section, we will provide you with tips and best practices for cleaning your Cuisinart Coffee Maker K Cup Side, covering everything from regular maintenance to descaling and keeping the exterior looking pristine.
Regular Cleaning Schedule
Creating a regular cleaning schedule for your Cuisinart Coffee Maker K Cup Side is the key to keeping it in optimal condition. We recommend cleaning the coffee maker at least once a month, or more frequently if you use it frequently. Follow these steps:
- Begin by unplugging the coffee maker and allowing it to cool down completely.
- Remove and discard any used K-Cups.
- Open the brew mechanism by lifting the handle completely.
- Remove the drip tray and water reservoir, then clean them with warm soapy water.
- Use a soft, damp cloth to wipe the inside of the coffee maker, removing any residue or coffee grounds.
- Rinse the removable parts with clean water and allow them to air dry.
- Before reassembling the coffee maker, wipe the exterior with a damp cloth to remove any spills or stains.
Using Vinegar For Descaling
Over time, mineral deposits can build up inside your coffee maker, affecting the taste of your coffee and the overall performance of the machine. Descaling with vinegar helps remove these deposits and restore your coffee maker’s functionality. Follow these steps to descale your Cuisinart Coffee Maker K Cup Side using vinegar:
- Fill the water reservoir with a mixture of equal parts white vinegar and water.
- Place a cup or mug on the drip tray to catch the liquid.
- Run a brewing cycle without a K-Cup, allowing the vinegar solution to flow through the coffee maker.
- Repeat the process with clean water to rinse out any vinegar residue.
- Finally, run two brewing cycles with clean water to ensure no vinegar taste remains.
Cleaning The Exterior
Keeping the exterior of your Cuisinart Coffee Maker K Cup Side clean not only makes it visually appealing but also prevents dust and dirt from entering the inner components. Here are some tips for effectively cleaning the exterior:
- Wipe the exterior with a microfiber cloth or a soft, damp cloth to remove any spills or stains.
- Avoid using abrasive cleaners or scrub brushes, as they can damage the surface of your coffee maker.
- For stubborn stains, make a paste using baking soda and water. Gently rub the paste on the stained area and rinse with clean water.
Avoiding Chemical Cleaners
While it may be tempting to use chemical cleaners for a deep clean, it is best to avoid them when cleaning your Cuisinart Coffee Maker K Cup Side. Chemical cleaners can leave behind residues or strong odors that can affect the taste of your coffee. Stick to using mild soapy water, vinegar, or baking soda for cleaning instead.
Cleaning The Water Reservoir
The water reservoir of your Cuisinart Coffee Maker K Cup Side is a crucial component that requires regular cleaning. Follow these steps to clean the water reservoir:
- Remove the water reservoir from the coffee maker.
- Empty any remaining water.
- Wash the reservoir with warm soapy water, ensuring to remove any residue or buildup.
- Rinse thoroughly with clean water.
- Allow the reservoir to air dry completely before reattaching it to the coffee maker.
By following these tips and best practices, you can ensure that your Cuisinart Coffee Maker K Cup Side remains clean and in excellent condition, providing you with delicious cups of coffee every time.
Common Issues and Troubleshooting
Even the most reliable and high-quality coffee makers can sometimes experience common issues that can disrupt your morning routine of enjoying a delicious cup of coffee. However, with a little troubleshooting, you can quickly resolve these problems and get back to brewing your favorite cup of joe with your Cuisinart Coffee Maker K Cup Side. Here are some of the most common issues and provide step-by-step solutions to ensure your coffee maker is back in working order.
Coffee Tastes Strange or Bitter
If you find that your coffee tastes strange or bitter, there could be a few factors contributing to this issue. Follow these steps to troubleshoot:
- Check the coffee grounds: Ensure that you are using fresh coffee grounds and the appropriate grind size for your coffee maker. Fine grinds can lead to over-extraction, resulting in a bitter taste. Incorrect measurement of the coffee grounds can also affect the taste, so be sure to follow the recommended ratio.
- Inspect the water quality: Poor water quality can impact the taste of your coffee. If you notice a strange taste, consider using filtered water to improve the flavor.
- Clean the coffee maker: Over time, mineral deposits and coffee oils can build up in your coffee maker, affecting the taste of your brew. Regularly descaling and cleaning your machine can help eliminate any unpleasant flavors.
Water Leakage from the Brewer
Water leakage can be an annoying issue with your coffee maker. Here’s what you can do to resolve it:
- Check the seals: Inspect the seals on the water reservoir and the brewing unit. Over time, seals can deteriorate or become misaligned, resulting in water leakage. If you notice any damage, replace the seals as needed.
- Properly insert the K-Cup: Ensure that the K-Cup is inserted correctly into the brewing unit. A misaligned or punctured K-Cup can cause water to leak out during the brewing process.
- Clean the needle: Sometimes, the needle that punctures the K-Cup can become clogged with coffee grounds or debris, leading to water leakage. Regularly clean the needle to prevent this issue.
Coffee Maker Not Brewing Properly
If your coffee maker is not brewing properly, follow these troubleshooting steps:
- Check the power source: Make sure your coffee maker is properly connected to a power source and that the outlet is functioning correctly. A loose or faulty power connection can cause brewing issues.
- Inspect the water reservoir: Ensure that the water reservoir is filled to the correct level. If the water level is too low, the coffee maker may not brew properly.
- Clean the needle: A clogged needle can prevent water from passing through and properly brewing your coffee. Regularly clean the needle to ensure a smooth brewing process.
- Reset the machine: If none of the above steps resolve the issue, try resetting your coffee maker by unplugging it from the power source for a few minutes and then plugging it back in. This can help reset any internal settings that may be causing the problem.
Unresponsive Buttons And Controls
If you find that the buttons and controls on your coffee maker are unresponsive, try these troubleshooting steps:
- Check the power connection: Ensure that your coffee maker is properly connected to a power source and that the outlet is functioning correctly. A loose or faulty power connection can cause unresponsive controls.
- Restart the machine: Sometimes a simple restart can resolve software or internal issues. Turn off your coffee maker, unplug it from the power source, wait for a few minutes, and then plug it back in. Turn it on and see if the controls respond.
- Clean the buttons: Accumulated dirt or debris can interfere with button operation. Gently clean the buttons with a damp cloth and ensure they are free from any obstructions.
Preventive Maintenance for Longevity
The key to ensuring your Cuisinart Coffee Maker K Cup Side stays in peak condition is regular preventive maintenance. By implementing a few simple cleaning and maintenance practices, you can extend the lifespan of your coffee maker, guaranteeing the best-tasting coffee cup after cup. In this section, we’ll explore the essential steps to maintain your Cuisinart coffee maker, including regular cleaning routines, replacing worn-out parts, and proper storage.
Regular Cleaning Routine
An essential aspect of preventive maintenance is establishing a regular cleaning routine for your Cuisinart Coffee Maker K Cup Side. Cleaning your coffee maker ensures that it operates efficiently and prevents the build-up of mineral deposits and residue that can affect the taste of your coffee. Follow these steps for effective cleaning:
- Regularly wash the removable parts of your coffee maker, such as the water reservoir, drip tray, and K-cup holder, with mild soap and warm water. This helps to remove any coffee residue or stains.
- Use a soft-bristled brush to clean hard-to-reach areas like the coffee maker’s needle, ensuring it remains unclogged and maximizes brewing performance.
- Run a cleansing brew cycle with a mixture of equal parts water and white vinegar. This helps to descale the internal components of the coffee maker, removing any mineral buildup.
- After completing the vinegar brew cycle, run several rinse cycles with fresh water to ensure any vinegar taste is thoroughly eliminated.
Replacing Worn-out Parts
Over time, certain parts of your Cuisinart Coffee Maker K Cup Side may start to wear out. To maintain optimal performance, it’s important to regularly check and replace any worn-out parts. Here are a few key components to inspect and replace as needed:
| Part | Signs of Wear | Replacement Frequency |
|---|---|---|
| Water Filter | Slow brewing, unusual taste, or water leakage | Every 2-3 months or as specified by the manufacturer |
| K-Cup Holder | Inconsistent puncturing, difficulty inserting K-cups | When signs of wear become noticeable |
| Drip Tray | Overflowing, inability to catch drips | When signs of wear become noticeable or as desired |
| Gaskets and Seals | Water leakage, unusual noise during brewing | When signs of wear become noticeable or as desired |
Proper Storage
When not in use or during extended periods of non-use, proper storage of your Cuisinart Coffee Maker K Cup Side is vital to maintaining its longevity. Follow these storage tips to ensure your coffee maker remains in great shape:
- Thoroughly clean all removable components and allow them to dry completely before storing.
- Store your coffee maker in a cool, dry place away from direct sunlight to prevent damage and discoloration.
- Consider wrapping the coffee maker in a clean cloth or placing it in a protective case to prevent dust accumulation and potential scratches.
- Prior to using the coffee maker again, remember to inspect all components for any signs of wear and perform a thorough cleaning as outlined earlier in this post.
Final Words
To keep your Cuisinart Coffee Maker K Cup Side in pristine condition, regular cleaning is paramount. By following the step-by-step guide detailed in this blog post, you can ensure that your coffee maker functions optimally and produces high-quality brews. Remember to clean the machine regularly, remove any coffee residue, and descale as necessary.
By doing so, you’ll enjoy a fresh, delicious cup of coffee every time. Cheers to a clean and efficient brewing experience!


