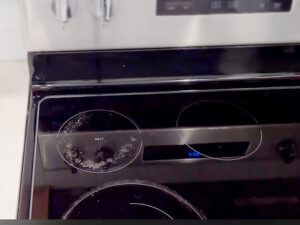
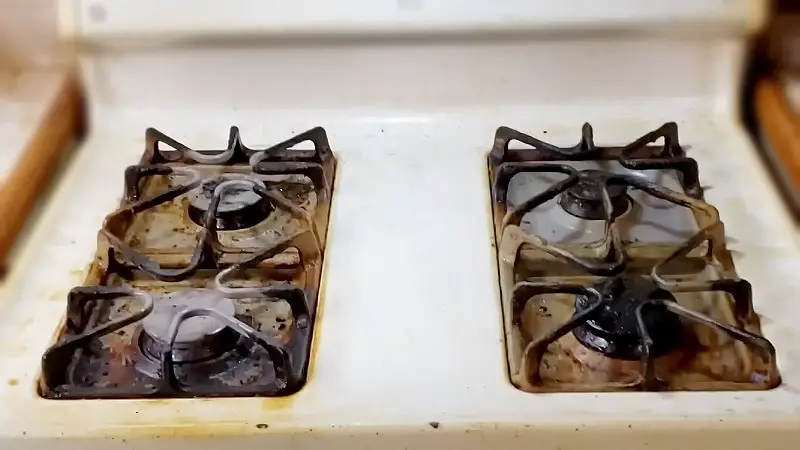
Spilled milk can quickly create a stubborn mess on your cooktop. You can clean your stove easily with a few steps and perseverance.
In this blog post, we’ll give you easy instructions to remove burned milk from your stove using common home products you already have. You don’t need fancy cleaning supplies or complicated methods. We’ll guide you through the entire process, covering safety measures and effective cleaning techniques.
You can modify these techniques for any type of cooktop. This article will help you clean up burned milk spills and keep your stove looking great.
Steps to Clean Burnt Milk Off Stove
Burned milk might be difficult to clean, but with the correct approach, your stove can look like new. A step-by-step guide follows:
Materials You’ll Need
- Safety gear: Wear gloves and safety glasses to protect your hands and eyes.
- Scraping tool: A plastic or wooden scraper to gently remove the burnt milk without scratching the stove.
- Baking soda: A mild abrasive cleaner that can help lift the burnt residue.
- Vinegar: A natural degreaser and cleaner.
- Warm water: To help dissolve the burnt milk and rinse the area.
- Soft cloth or sponge: For wiping and cleaning.
- Dish soap: To break down grease and grime.
Step 1: Secure First
All measures must be taken before cleaning. Touch the stove immediately when it’s cold to avoid burns. Before cleaning, gather your materials and wear gloves and goggles to protect your hands and eyes.
Step 2: Remove Free Debris
First, thoroughly scrape the stovetop to remove loose or easily removed burnt milk residue. Use a plastic or wooden scraper to avoid damaging the stove’s finish. Wipe off as much residue as possible as you carefully go over the affected regions. Cleaning processes are more efficient after this initial step.
Step 3: Produce Baking Soda Paste
A moderate abrasive cleaner like baking soda may remove burned-on milk residue. Combining baking soda and a little water in a small basin makes a thick paste. The finished paste should be spreadable but not excessively thick or thin. Baking soda cleans stoves without damaging them.
Step 4: Baking Soda Paste
Apply thick baking soda paste to burned milk. The burned-on residue must be thoroughly covered with paste. Wait 15 minutes before touching the paste. Baking soda works as a mild abrasive, making scorched milk easier to remove.
Step 5: Gently Clean with Cloth or Sponge
The baking soda paste may eliminate scorched milk residue after time. Scrub the affected areas gently with a cloth or sponge. Be cautious not to scratch the stove by using too much effort. Circular motions will work with baking soda.
The residue should be released owing to gritty baking soda and burned milk bonding. Scrub till the residue disappears. This may be performed many times depending on how severely the milk was burnt.
Step 6: Rinse with Warm Water
Clean the stove top with water after removing the burnt milk residue with baking soda paste. Use a clean, wet cloth or sponge to remove baking soda paste and scorched milk residue. Rinse the towel or sponge repeatedly to avoid spreading the mess.
In order to remove all baking soda and scorched milk, rinse with warm water. This method makes the stove cleaner and ready for the next cleaning.
Step 7: Vinegar Removes Oil
Vinegar is renowned for cleaning and degreasing. Shake white vinegar and water in a spray bottle. Spray this solution evenly over the stovetop and let it sit for a few minutes. Vinegar removes tenacious grease and grime like burnt milk.
Wash the stove with a new sponge or towel once the vinegar solution has worked. Vinegar and water should clean and revitalize your stove.
Step 8: Cleaning with Soap and Water
For thorough cleaning, mix warm soapy water. Pour a few drops of dish soap into a basin of water and mix to dissolve. Wipe the stove with a moist cloth or sponge, getting into all the cracks. Dissolving residual oil and dirt ensures the stove is clean.
Soapy water cleans and revitalizes surfaces. Rinse and wring the cloth or sponge regularly to prevent soap residue from spreading.
Step 9: Shine
After cleaning, dry the stove with a clean cloth. Dry the surface well after washing to prevent water spots and streaks. A dry, gleaming cooktop appears clean and is devoid of cleaning agents.
Check for streaks and stains once the stove dries. Any you see may be simply removed with a dry cloth. When finished, your stovetop will sparkle and be ready.
Alternative Methods to Clean Burned Milk from the Stove
There are many ways to clear burned milk off a stove, depending on the intensity, stove type, and resources available. Here are some alternatives:
1. Salt and Lemon Juice
Natural acidity in fresh lemon juice helps remove burnt-on residues. Squeeze fresh lemon juice liberally over scorched cooktop surfaces to begin this process. Sprinkle generously with table salt over the lemon juice. Salt helps remove scorched milk residue as a mild abrasive. Let the lemon juice and salt combination soak on spots for 10-15 minutes. Lemon juice helps soften scorched milk, making it simpler to remove. After that, use a sponge or rag to gently cleanse. Lemon juice and salt should remove burned milk.
2. Commercial Stovetop Cleaner
Commercial cooktop cleansers are designed to remove tough stains, including burnt-on residues. Following the manufacturer’s instructions is crucial since brand use guidelines may differ. The cleanser is usually applied on scorched areas and left to settle. The cleaner has time to penetrate and dislodge residue. Wipe or clean the afflicted areas with a sponge or towel after the specified time. Commercial cleaners can remove burned milk stains well.
3. Baking Soda and Hydrogen Peroxide
A hydrogen peroxide-baking soda paste may remove scorched milk residue. First, combine these two ingredients in a dish to make a thick, spreadable mixture. Apply this paste to your stove’s burned milk marks and cover well. Let the paste settle for 20 minutes. Baking soda and hydrogen peroxide can soften scorched milk residue at this time. A gentle scrub with a gentle cloth or sponge to remove residue. Finish by rinsing and drying.
4. Boiling Water
A simple yet efficient way to remove burnt-on residue is to boil water. Start by boiling water. Take care to soak the burned milk streaks in boiling water. Wait a few minutes to soften the scorched milk in water. After soaking, carefully remove the softened residue with a scraper or sponge. Be careful not to scratch the stove’s surface with the scraping instrument.
5. Glass Stovetop Razor Blade Or Ceramic Glass Scraper
A razor blade or ceramic glass scraper may delicately remove burnt-on debris from glass stovetops. The blade must be handled carefully and held at a low angle to the glass to avoid scratches. Scrape off the residue slowly without pressure.
6. Ammonia Solution
Burnt milk residue may be broken down using ammonia. Create a cleaning solution by mixing 1/4 cup ammonia with one quart of water in a container. Use this ammonia solution to thoroughly cover the stove’s charred regions. Rest the solution for 15-20 minutes. Ammonia breaks down burned milk residue during this period. Wipe residue with a sponge or towel after soaking. The stove should be rinsed and dried to finish cleaning.
How can I prevent milk from Burning on the Stove in the future?
It is essential to put a halt to the milk from burning on the fire in order to maintain the cleanliness of the stove and prevent your food from absorbing undesirable tastes and aromas. The following recommendations may be of assistance in keeping the milk from catching fire when it is being cooked:
Determine the type of Cookware You Will Need
Choose a saucepan or skillet that has a deep well in the bottom. This sort of cookware is better at distributing heat uniformly and reducing the likelihood of hot spots, which may cause milk to scorch if they are not eliminated.
Control the Temperature
When heating milk, select settings between low and medium for the temperature. It’s important to remain patient since milk may easily burn when exposed to high heat. It is vital to get the knowledge required to control the settings on your stove and to adjust the burner or heat as required.
Combine on a Regular Basis
It is very necessary to whisk the mixture on a regular basis using a wooden spoon or a heat-resistant spatula. This straightforward action prevents the milk from congealing on the base of the pan and catching fire.
Heating Slightly More Each Time
To begin, you’ll need milk that is either chilled or at room temperature. While the milk is coming to temperature, gently raise the temperature of the stove. This meticulous approach ensures a smooth texture while also lowering the risk of burning.
Position the two Boilers as Follows
The use of a double boiler is an option to consider when preparing meals that need lengthy heating or simmering. By heating the milk using a double boiler, which provides indirect heat, there is a much reduced risk of the milk catching fire.
Keep the Water from Boiling
Unless the instructions for the recipe clearly state that you should bring the milk to a rolling boil, you should prevent the milk from reaching that point. The majority of recipes benefit from being cooked at a low heat at a gentle simmer, which also reduces the risk of the food burning.
Cookware that Doesn’t Stick
If at all feasible, you should cook using pots and pans that do not stick. Because food, and particularly milk, has a lower propensity to adhere to these surfaces, the cleaning process is simplified and the danger of fire is reduced.
Be Sure to Add a Pinch of Salt
A very little amount of salt may be used to loosen milk that has been adhered to the surface of the pan. But watch out that you don’t add too much salt to your cuisine, particularly when you’re cooking up any sweet dishes.
Utilize Some Kind of Diffuser
Installing a heat diffuser or simmer ring in the bottom of your pan will help reduce the likelihood of hotspots and milk scalding.
Always Be on the Lookout
When heating the milk, use caution. Because of how readily it may catch fire, you should never leave it alone for even a split second. Being present in the kitchen is required if one wants to prevent scalding themselves.
A Brief Tidying Up
In the event that milk boils over or spills, immediately wipe it up. In the event that it is not removed promptly, burnt milk residue may be challenging to clean up and can alter the flavor of other foods.
Adapt the Recipe as Follows
If you have had problems with milk catching fire in the past, you may want to modify your recipes in order to reduce the likelihood of this happening again. You might, for instance, substitute one ingredient for another when it seems suitable or use milk at the conclusion of the process of cooking.
Physical Activity and Stamina
Experience is the best teacher when it comes to developing skills, and cooking with milk is no exception. As you acquire more expertise, you will become more adept at regulating the temperature and protecting yourself from burns.
Common Mistakes to Avoid When Cleaning Burnt Milk Off a Stove?
There are several mistakes to avoid when cleaning burnt milk off a stove to make the process easier and less frustrating. Examples of these mistakes:
- Use Abrasive Scrubbers: Avoid using harsh scouring powders or pads on your stove. They can scratch and damage the finish, making it stainable.
- Neglecting Safety: Turn off and cool your stove before cleaning. Safety violations can cause burns or accidents.
- Scraping Burnt Milk with Sharp Tools: Knives and razor blades can scratch and damage the stove’s surface. Use plastic or wooden tools.
- Avoid Harsh Chemicals: Harsh or abrasive cleaning chemicals can damage your stove’s finish or leave harmful residues. Clean with gentle stovetop cleaners.
- Lack of Ventilation: Cleaning products can be inhaled if the kitchen is not ventilated. Open windows or use the kitchen exhaust fan for clean air.
- Avoid letting burnt milk residue sit on the stove: It gets harder to remove the longer it stays. Prompt action is crucial.
- Using Too Much Force: Scrubbing too hard can damage the stove’s finish and make cleaning harder. Press gently but consistently.
- Cleaning While Hot: Cleaning a hot stove can cause cleaning products to evaporate quickly, leaving streaks or ineffective cleaning. Always let the stove cool.
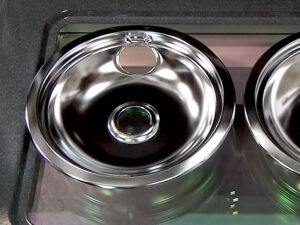
- Forgetting the Burners: Remove and clean the stove burners separately. Burnt milk residue can build up around and under burners.
- Using the Wrong Cleaning Product: Avoid using the wrong cleaning product for your stove’s surface. Avoid damaging items by following manufacturer instructions.
- Skipping a Test Spot: Before using a new cleaning product or method, test it on a small, inconspicuous stove area to avoid damage or discoloration.
- Rushing: Stovetop burnt milk cleanup takes time. Rushing can lead to a poor job. Take time to clean the stove.
Avoid these mistakes to clean burnt milk off your stove without damaging it. Stove maintenance will keep it in good condition.
Final Words
This article should help you remove burnt milk from your stove. Even the most skilled cooks can make mistakes. However, with the right methods, you can easily fix this problem.
These steps will keep your stovetop clean: prioritize safety, use common household items, and carefully follow the instructions. Regular maintenance and spill cleanup can prevent burnt milk.
These simple methods will help you remove burnt milk with confidence. This will keep your stove looking great and be the centerpiece of your kitchen.