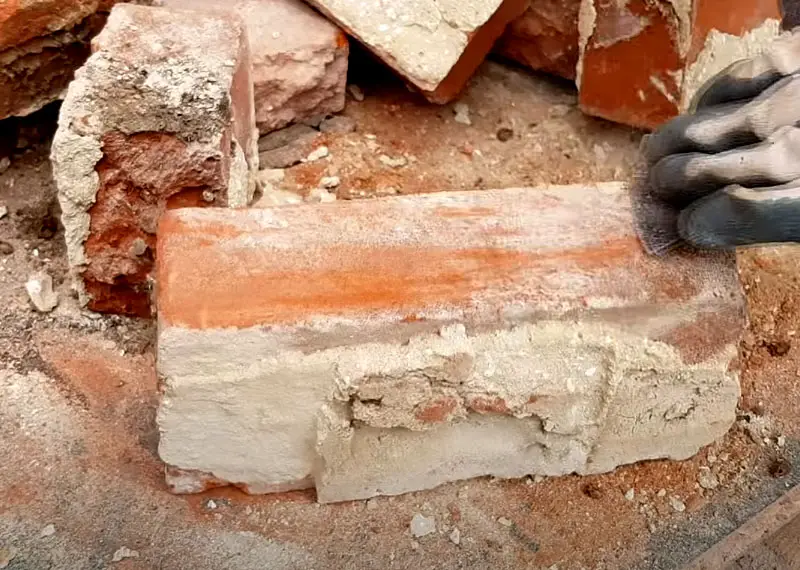
Are you faced with the task of removing mortar from bricks? This can be a challenging task, but with the right tools and techniques, it can be done effectively. Whether you are renovating an old structure or simply want to clean up the appearance of your bricks, this guide will provide you with the necessary steps to remove mortar easily.
By following these instructions, you will be able to restore the bricks to their original state without causing any damage to the surface. So, let’s dive in and learn how to remove mortar from bricks without any hassle.

Why Removing Mortar From Bricks Is Important
Mortar plays a crucial role in the stability and longevity of any brick structure. Over time, however, mortar can deteriorate, leading to weakened adhesion and potential damage to the bricks themselves.
Removing old mortar is an essential step before applying new mortar as it ensures proper adhesion for the fresh material. This process not only enhances the overall strength of the structure but also prevents future cracks and structural issues.
Additionally, removing mortar from bricks improves the appearance of the structure, giving it a clean and polished look. In this section, we will explore the importance of removing mortar from bricks in more detail.
Ensures Proper Adhesion For New Mortar
When old mortar starts to deteriorate, its adhesion to the bricks weakens, compromising the structural integrity of the entire construction. By removing the old mortar, we create a clean and solid surface for the application of new mortar. This ensures a stronger bond between the bricks and the fresh mortar, promoting the stability and durability of the structure as a whole.
Prevents Damage To The Bricks
If left unattended, deteriorating mortar can cause serious damage to the bricks. As the mortar weakens, it loses its ability to protect the bricks from external elements, such as moisture and temperature changes. Unprotected bricks are more susceptible to cracking, chipping, and erosion.
By removing the old mortar and replacing it with new, intact mortar, we can prevent further damage to the bricks, prolonging their lifespan and maintaining the structural integrity of the entire construction.
Improves The Overall Appearance Of The Structure
The appearance of any brick structure can significantly impact its value and appeal. Over time, mortar can become discolored, stained, or unevenly distributed, detracting from the aesthetic beauty of the building.
By removing old mortar and replacing it with fresh mortar, the structure’s appearance is instantly enhanced. The clean and uniform application of mortar gives the structure a sleek and attractive look, improving its curb appeal and overall visual appeal.
Tools And Materials Needed
Removing mortar from bricks can be a daunting task, but with the right tools and materials, it can be done efficiently and effectively. Whether you’re renovating an old brick structure or simply trying to clean up the appearance of your bricks, having the following tools at hand will make the job much easier.
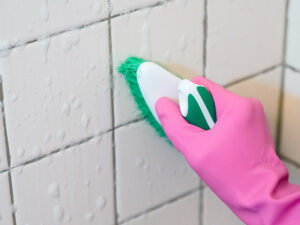
Safety Goggles and Gloves
When it comes to any kind of home improvement project, safety should always be a top priority. Protecting your eyes and hands is crucial when working with power tools and sharp objects. Safety goggles will shield your eyes from flying debris, while sturdy gloves will keep your hands safe from cuts and injuries. Make sure to wear these protective gear throughout the mortar removal process.
Hammer And Chisel
A hammer and chisel are essential tools for manually removing mortar from bricks. The chisel should have a sharp edge to allow for precise and controlled chipping away of the mortar. Use the hammer to strike the chisel, gradually breaking up the hardened mortar and separating it from the bricks. This method requires a bit of patience and strength, but it’s a classic approach that has proven to be effective.
Angle Grinder With A Diamond Blade
If you’re dealing with a large area or thick layers of mortar, an angle grinder with a diamond blade is a powerful tool that can speed up the process. The diamond blade can easily cut through the hardened mortar, allowing you to remove it quickly.
However, please note that operating an angle grinder can be dangerous if not done carefully. Make sure to read the manufacturer’s instructions and take the necessary safety precautions.
Wire Brush
A wire brush is useful for cleaning up any remaining bits of mortar after using the hammer and chisel or angle grinder. The stiff bristles of the brush can effectively remove loose mortar, leaving a clean and tidy surface. Remember to brush gently to avoid scratching or damaging the bricks.
Suction Vacuum
To prevent dust and debris from spreading across your workspace, it’s recommended to use a suction vacuum during the mortar removal process. This handy tool will suck up the particles as you work, keeping your area clean and minimizing the need for additional cleanup. Removing mortar can create a significant amount of dust, so having a suction vacuum will make the job much more manageable.
Plastic Sheeting Or Drop Cloth
Lastly, to protect your surroundings from dust and debris, it’s a good idea to lay down a plastic sheeting or drop cloth. This will catch any falling mortar pieces and make cleaning up easier afterward. Simply spread the sheeting or drop cloth around the area where you’ll be working to contain the mess, ensuring a more organized and efficient workspace.
Method 1: Traditional Method Using a Hammer And Chisel
When it comes to removing mortar from bricks, the traditional method using a hammer and chisel is a tried and true technique. It requires a bit of elbow grease, but with the right tools and proper technique, you can achieve great results.
Preparation
Before you start removing the mortar, it’s important to prepare properly. Here’s what you need to do:
- Gather your tools: A hammer, a cold chisel or brick chisel, safety goggles, a dust mask, and gloves.
- Put on your safety gear: Safety should always be a top priority. Put on your safety goggles and dust mask to protect your eyes and lungs from flying debris.
Removing Large Chunks Of Mortar
The first step in the process is to remove the large chunks of mortar from the bricks. Follow these steps:
- Position yourself at a comfortable angle, ensuring you have a good grip on the tools.
- Hold the chisel against the mortar at a slight angle.
- With a firm and controlled motion, strike the chisel with the hammer, breaking off the larger pieces of mortar.
- Continue this process, working your way around the mortar joint, until you have removed all the large chunks.
Removing Smaller Mortar Fragments
Once you have removed the larger pieces of mortar, you need to focus on removing the smaller fragments that are still clinging to the bricks. Here’s what you need to do:
- Switch to a smaller chisel or a mortar rake for better control and precision.
- Work carefully, using the smaller chisel or rake to scrape away the remaining mortar without damaging the bricks.
- Use light tapping motions with the hammer to gently break away any stubborn mortar.
- Continue this process until all the mortar fragments have been removed.
Clean Up
Once you have successfully removed all the mortar from the bricks, it’s important to clean up the area properly to prevent any damage or mess. Follow these steps:
- Use a soft brush to sweep away loose debris from the bricks and mortar joint.
- Use a vacuum cleaner or a shop vac to remove any remaining dust and particles.
- Wipe down the bricks with a damp cloth to remove any residual dust or mortar residue.
By following these steps, you can remove mortar from bricks using the traditional method of a hammer and chisel. Remember to take your time, work with precision, and prioritize safety throughout the process.
See Also: Quick Steps to Clean Window Air Conditioner Without Removing It: Easy Steps for Optimal Performance
Method 2: Using an Angle Grinder
Method 2: Using an angle grinder is an effective way to remove mortar from bricks. With careful handling, the grinder can easily break down the mortar, giving your bricks a fresh look.
Using an angle grinder with a diamond blade is another effective method to remove mortar from bricks. This method requires caution and proper preparation to ensure safety and efficiency.
In this section, we will outline the steps involved in using an angle grinder for mortar removal, as well as provide tips for dealing with stubborn mortar spots and cleaning up.
Preparation
Before you start using an angle grinder to remove mortar from bricks, it is crucial to take proper safety precautions. Here’s what you need to do before getting started with the process:
- Put on safety goggles, a dust mask, and thick work gloves to protect your eyes, respiratory system, and hands from flying debris.
- Secure the brick or mortar that you’ll be working on. It’s best to use clamps or a vice to hold the materials in place, ensuring stability throughout the process.
- Inspect the angle grinder. Check if the diamond blade is securely attached and in good working condition. Make sure the grinder is properly connected to a power source.
- Prepare a spacious and well-ventilated area where you can work comfortably. Clear any clutter or obstacles that may hinder your movements during the process.
Using the Angle Grinder with a Diamond Blade
Now that you have completed the necessary preparations, you are ready to start using the angle grinder to remove the mortar. Follow these steps for effective and safe execution:
- Position the angle grinder at a 30-degree angle to the mortar joint.
- Start the grinder and smoothly guide the diamond blade along the mortar line, applying gentle pressure.
- Move the grinder back and forth in a steady motion, making sure to cover the entire length of the mortar joint.
- Continue grinding down the mortar until you reach the desired depth. Be careful not to cut into the bricks themselves.
- Regularly stop to allow the grinder to cool down and prevent overheating.
Removing Stubborn Mortar Spots
While most of the mortar will be removed with the angle grinder, there may be some stubborn spots that require extra attention. Here are a few tips to help you effectively deal with those challenging areas:
- Use a chisel and hammer to carefully chip away at the remaining mortar spots.
- Alternatively, attach a carbide-grit rasp to the angle grinder and use it to remove the stubborn mortar.
- Take your time and be patient. It’s crucial to maintain precision and control during this process.
Clean Up
Once you have removed the mortar, it’s essential to clean up the workspace properly. Here’s how you can ensure a thorough clean-up:
- Collect all the debris and residue using a broom and dustpan.
- Dispose of the debris in a suitable waste container or garbage bag.
- Vacuum the area to remove any remaining dust or fragments.
- Wipe down the bricks with a damp cloth to remove any leftover dust or debris.
Remember, using an angle grinder with a diamond blade can be a highly effective method for removing mortar from bricks. Just ensure you take the necessary safety precautions, follow the step-by-step instructions provided, and clean up thoroughly afterward. With patience and precision, you’ll be able to achieve clean and professional-looking brick surfaces for your next project.
Method 3: Chemical Mortar Removal
Choosing the Right Chemical Product
When it comes to removing mortar from bricks, using a chemical product can be an effective and time-saving method. However, it’s crucial to select the right product for the job. Not all chemicals are suitable for removing mortar, so it’s best to choose one specifically designed for this purpose.
Look for a chemical product that contains muriatic acid or phosphoric acid, as these are known to be highly effective in breaking down mortar. Additionally, check the packaging to ensure that the product is safe to use on the type of bricks you have. Different types of bricks may react differently to certain chemicals, so it’s essential to read and follow the instructions provided by the manufacturer.
Applying The Chemical Product
Once you have chosen the right chemical product, it’s time to apply it to the bricks. Here’s a step-by-step guide to help you:
- Put on protective gloves, safety goggles, and a mask to protect yourself from any potential harm.
- Dilute the chemical product according to the instructions provided. This will ensure the proper strength for effective mortar removal.
- Using a brush or a sprayer, apply the diluted chemical solution directly onto the mortar. Ensure that you cover the entire area where the mortar is present.
- Allow the chemical to sit on the mortar for the recommended amount of time. This will vary depending on the product you are using, so refer to the instructions for guidance.
Scraping Off The Softened Mortar
After the chemical has had enough time to work its magic, the mortar should be softened and easier to remove. Follow these steps to scrape off the softened mortar:
- Use a scraper or trowel to gently scrape away the softened mortar. Be careful not to apply too much pressure, as this could damage the bricks.
- Work in small sections at a time, focusing on removing the mortar without causing any further damage.
- Periodically rinse the area with clean water to remove any residue left behind by the chemical product.
- Continue this process until all of the mortar has been successfully scraped off the bricks.
Clean Up
Once you have removed the mortar, it’s important to properly clean up the area to ensure a tidy finish. Here are some tips to help you with the clean-up process:
- Dispose of any excess chemical solution or residue according to the instructions provided by the manufacturer. This is important for both your safety and the environment.
- Rinse the bricks thoroughly with clean water to remove any remaining chemical residue.
- Inspect the bricks for any stubborn mortar spots that may require further attention. You can repeat the chemical removal process if necessary.
- Finally, allow the bricks to dry completely before proceeding with any additional treatments or finishing touches.
Frequently Asked Questions
How Do You Remove Dried Mortar From Bricks?
To remove dried mortar from bricks, use a stiff brush to scrub off as much mortar as possible. Then, apply a mixture of muriatic acid and water to dissolve the remaining mortar. Rinse the bricks thoroughly with water afterward. Be sure to wear protective gear and follow safety instructions carefully.
What Product Removes Mortar From Brick?
A mortar removing product is used to remove mortar from brick surfaces. It effectively breaks down the mortar, making it easy to scrape off and clean the bricks. It is a convenient solution for improving the appearance and quality of brickwork.
How Do You Remove Dry Cement From Bricks?
To remove dry cement from bricks, follow these steps: Use a wire brush to scrape off as much cement as possible. Apply a commercial brick cleaning solution and scrub with a stiff brush. Rinse the area with water to remove any remaining residue. If necessary, repeat the process until the cement is completely removed. Finish by sealing the bricks to protect them from future damage.
Conclusion
Removing mortar from bricks requires careful attention to detail and the right tools. By following the step-by-step guide outlined you can effectively remove mortar while preserving the integrity of your bricks. Remember to prioritize safety, use protective gear, and take your time to ensure a successful removal process.
With these techniques, you can restore the beauty of your brickwork and maintain its longevity.