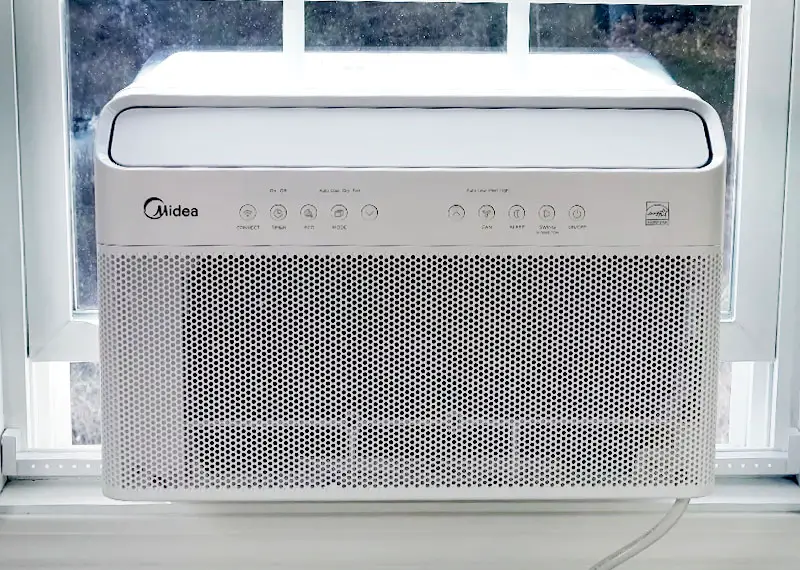
Windows air conditioners are a convenient option for cooling specific rooms or small spaces. However, over time, they can accumulate dirt, dust, and debris, which can affect their efficiency and lead to poor air quality. Regularly cleaning your window air conditioner can help maintain its performance and prolong its lifespan.
Cleaning your window air conditioner without removing it is a simple process that can be done with a few basic tools and materials. We will guide you through the step-by-step process of cleaning your window air conditioner without removing it, ensuring that it remains in good working condition.
First, gather the necessary tools and materials: a vacuum cleaner with a brush attachment, a damp cloth, and a screwdriver (if required for your specific unit). Once you have everything you need, you can follow the steps below to clean your window air conditioner.
Preparation
Before diving into cleaning your window air conditioner, it’s important to gather the necessary tools and take some precautions to ensure a safe and effective cleaning process. By following these steps, you’ll be ready to tackle the task at hand and keep your air conditioner running smoothly.
Gather Necessary Tools
Start by collecting the tools you’ll need for the cleaning process. Having everything on hand will save you time and make the job much easier. Here are the essential tools you’ll need:
| Tools | Materials |
|---|---|
|
|
Turn Off the Power
Before starting any cleaning process, it’s crucial to turn off the power supply to your window air conditioner. This step will prevent any accidents or damage during the cleaning process. Follow these steps to ensure the power is turned off:
- Locate the power cord of your air conditioner.
- Unplug the power cord from the electrical outlet.
By turning off the power, you’ll create a safe environment to work in without the risk of electric shock or damage to the unit.
Cleaning the Filter
Cleaning the filter not only improves the quality of the air you breathe but also ensures that your air conditioner operates at its best. In this section, we’ll guide you through the step-by-step process of cleaning the filter without the need to remove the unit from the window.
Remove the Filter
The first step in cleaning the filter of your window air conditioner is to carefully remove it from the unit. Start by locating the filter access panel, which is usually located on the front or side of the air conditioner. Open the panel and take out the filter. It may be secured with clips or screws, so be sure to use the appropriate tools for removal.
Vacuum the Filter
Once you’ve removed the filter, it’s time to remove the dust and debris that has accumulated on its surface. Use a vacuum cleaner with a brush attachment to gently vacuum the filter. Begin from one side and slowly work your way across the entire surface, ensuring that you cover both the front and back of the filter. Pay close attention to any stubborn dirt or particles that may be trapped in the filter’s crevices.
Wash the Filter
After vacuuming, it’s time to give the filter a deeper clean. Fill a basin or sink with warm water and add a mild detergent. Submerge the filter in the soapy water and gently scrub it using a soft brush or sponge. Be sure to clean both sides of the filter, paying extra attention to any particularly dirty areas. Rinse the filter carefully under running water to remove any remaining soap residue.
Dry and Reinstall the Filter
Once the filter is clean, it’s important to allow it to dry thoroughly before reinstalling it. Shake off any excess water from the filter and place it in a well-ventilated area to air dry. Avoid direct sunlight as it may cause the filter to fade or distort. Once the filter is completely dry, carefully reinstall it back into the air conditioner, following the same steps you used to remove it.
Cleaning the filter of your window air conditioner is a simple yet crucial maintenance task. By regularly cleaning the filter, you not only enhance the performance of your air conditioner but also promote cleaner and healthier air indoors. Remember to clean the filter at least once every month during peak usage periods to ensure the optimal functioning of your window air conditioner.
Cleaning the Coils and Fins
When it comes to maintaining your window air conditioner, cleaning the coils and fins is an essential task. Over time, dust, dirt, and debris can accumulate on these delicate components, reducing the efficiency of your AC unit and affecting its cooling performance. Thankfully, you can clean the coils and fins without removing the entire unit from your window. In this section, we will walk you through the process step by step.
Accessing the Coils and Fins
The first step to cleaning the coils and fins of your window air conditioner is to gain access to them. To do this, you will need to remove the front grille or cover of your AC unit. Refer to the manufacturer’s instructions for your specific model to locate the screws or clips that hold the cover in place. Once you have removed the front grille, you will be able to see the coils and fins.
Vacuuming the Coils and Fins
After accessing the coils and fins, it’s time to remove any loose dirt and dust. Use a brush attachment on your vacuum cleaner to gently remove the debris from the coils and fins. Make sure to move the brush attachment in straight lines parallel to the fins to avoid bending or damaging them. Take your time to thoroughly vacuum all the surfaces and corners, ensuring that you remove as much dirt as possible.
Brushing and Wiping the Coils and Fins
Once you have vacuumed away the loose dirt, it is time to tackle any stubborn grime that may be stuck to the coils and fins. Using a soft-bristle brush or a fin brush, gently scrub the coils and fins to dislodge any remaining dirt or debris. Be careful not to apply too much pressure that could bend or damage the delicate fins. After brushing, take a damp cloth or sponge and wipe away any residue, ensuring a clean and smooth surface.
Remember to unplug your air conditioner before performing any cleaning tasks to ensure your safety. Regularly cleaning the coils and fins not only helps your window air conditioner perform more efficiently but also prolongs its lifespan. By following these simple steps, you can keep your air conditioning unit in optimal condition and enjoy cool and refreshing air all summer long.
Cleaning the Drainage System
Learn how to effectively clean your window air conditioner without the hassle of removing it. Keep your drainage system clear and your unit running smoothly with these simple steps.
Locating The Drainage System
To efficiently clean your window air conditioner without removing it, you need to first locate the drainage system. This system plays a crucial role in removing condensed water from the unit, preventing it from accumulating and causing damage. The drainage system typically consists of a drainage tray and a drainage hole. Identifying the exact location of these components is essential before proceeding with the cleaning process.
Removing And Cleaning The Drainage Tray
Once you have located the drainage tray, the next step is to remove it for thorough cleaning. This tray collects the condensed water and any dust or debris that may have accumulated. Follow these simple steps to remove and clean the drainage tray:
- Switch off the air conditioner and unplug it from the power source to ensure safety.
- Locate the access panel that covers the drainage tray. It is usually situated at the bottom or rear of the unit.
- Remove the screws or clips that secure the access panel in place, using a screwdriver or pliers.
- Gently slide out the drainage tray from its compartment.
- Dispose of any standing water from the tray and empty it into a sink or bucket.
- Clean the tray using a mixture of mild detergent and warm water. Scrub off any dirt or grime using a soft brush or sponge.
- Rinse the tray thoroughly to remove any soapy residue.
- Dry the tray completely before placing it back into the unit.
Clearing the Drainage Hole
The drainage hole is responsible for allowing the condensed water to flow out of the air conditioner. Over time, this hole can become clogged with dirt or debris, hindering proper drainage. Clearing the drainage hole is crucial to ensure smooth water flow. Follow these steps to clear the drainage hole effectively:
- With the drainage tray still removed, locate the drainage hole in the unit. It is usually a small opening situated near the bottom of the air conditioner.
- Inspect the hole for any visible blockages such as dirt or debris.
- Use a small, flexible brush (like a pipe cleaner) or a gentle stream of water to clear the accumulated dirt or debris from the drainage hole.
- Ensure that the hole is clean and free from obstructions before reinserting the drainage tray.
Final Steps
Learn how to clean your window air conditioner effortlessly without having to remove it. Follow these simple steps to keep your air conditioner functioning smoothly and efficiently.
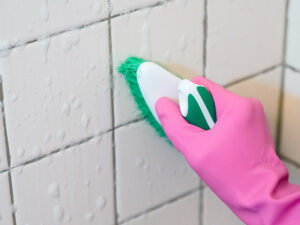
Cleaning the Exterior
Once you have completed the interior cleaning of your window air conditioner, it’s time to focus on the exterior. This step is crucial as it ensures that your air conditioner not only looks clean but also functions optimally. Start by wiping down the exterior surface of the air conditioner using a damp cloth. Make sure to remove any dirt, dust, or grime that may have accumulated over time.
Pay extra attention to the air vents and the fan blades, as these areas tend to collect the most debris. Gently scrub the fan blades with a soft-bristle brush to remove any stubborn dirt. Avoid using harsh chemicals or abrasive materials that could damage the unit. Once you are satisfied with the cleanliness of the exterior, move on to the next step.
Powering on the Air Conditioner
Now that you have thoroughly cleaned the window air conditioner, it’s time to power it back on. Double-check that the power cord is securely plugged into an electrical outlet. Before turning on the air conditioner, ensure that the control panel is set to the desired temperature and cooling mode. Once everything is properly set, switch on the air conditioner and listen for any unusual noises or vibrations.
In the initial minutes, it is normal for the unit to make some noise as it adjusts to the new settings. Monitor the air conditioner for a few minutes to ensure that it is running smoothly and cooling effectively. If you notice any issues or inconsistencies, consult the manufacturer’s manual or contact a professional for assistance.
By following these final steps, you can confidently clean your window air conditioner without removing it and have it ready to provide you with cool and refreshing airflow during those hot summer days. Regular maintenance and cleaning will not only prolong the life of your air conditioner but also ensure that it functions efficiently, saving you both energy and money. So, don’t neglect this essential task and keep your window air conditioner in top-notch condition.
Final Words
Keeping your window air conditioner clean is essential for optimal performance. By following the step-by-step guide provided in this blog post, you can effectively clean your unit without the hassle of removing it. Regular maintenance will not only improve air quality but also prolong the lifespan of your air conditioner.
So, take the time to clean your window air conditioner and enjoy cool and fresh air all summer long.