There are some nice things about living in an older house, but sometimes you have to deal with upkeep problems. Recently, I had a problem with water spots on the roof of my bathroom. It was a steady reminder of a leak I had to deal with right away. After doing a lot of studies and trying out different ways to get rid of those unsightly water stains, I’m sure I can give you some good advice.
When I had to deal with this problem, I learned that getting rid of water stains takes time, the right tools, and a methodical approach. In this blog post, I’ll show you the step-by-step process I used to get rid of water spots on the ceiling of my bathroom. With a little work and a few tips, you can bring your ceiling back to its former beauty and get rid of those annoying signs of water damage.
What Causes Water Stains on Bathroom Ceilings Most of the Time?
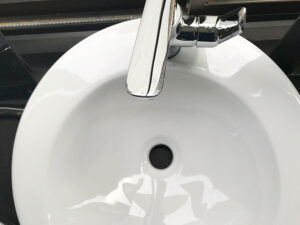
There are many things that can cause water spots on bathroom ceilings, and each of them could be a sign of a problem that needs to be fixed. Leaks from plumbing fixtures or pipes that are above the roof are common causes. Leaky pipes, dripping taps, or broken showerheads can let water leak through and leave stains over time.
Another possible reason is that the bathroom doesn’t have enough airflow. If there isn’t enough airflow, moisture can build up, which can cause mold and mildew to grow and leave water stains on the roof.
Water spots can also be caused by roof leaks, which can be a big problem. If the bathroom is right under the roof or if there are broken roof tiles, rainwater can get in and leave marks on the ceiling that don’t look good. Water spots can also happen because of condensation. When hot, steamy showers or baths make the air humid, water can condense on the ceiling and leave spots and discoloration.
It’s important to remember that the only way to get rid of watermarks and stop more damage is to find out why they happened in the first place. Regular checks of plumbing connections, the roof, and ventilation systems can help figure out where the problem is coming from.
By fixing the problem at its source and making any repairs or changes that are needed, you can get rid of water stains and keep your bathroom ceiling clean and in good shape.
How to Figure Out How Bad the Water Damage is on Your Bathroom Ceiling
When your bathroom ceiling has been damaged by water, you need to figure out how bad the damage is before you start fixing it. By knowing how bad the damage is, you can figure out the best way to fix it and make sure it gets fixed right. Here are some steps that will help you figure out how bad the water damage is:
Seeing what’s there
Start by looking at the place that is hurt. Look for discoloration, sagging, paint that is peeling off, or water spots that you can see. Check to see if the damage is limited to one area or if it has spread to more places.
Softness and Feel
Touch the part of the roof that is broken gently. If it feels soft or spongy or looks like it’s sinking, it means that water damage is worse. This could mean that the water has gotten into the ceiling and that it needs a lot of work.
Growth of Mold or Mildew
Mold and mildew grow well in damp places, so you should check for them. If you spot fuzzy growth or a musty smell, it means that the area has been exposed to water for a long time and could have water damage underneath.
Integrity of Structure
Check to see how well the ceiling is put together. If you see cracks, bulges, or places that look like they are getting weaker, it means that the water damage has made the roofless stable.
Where the water comes from and how long it stays
Think about where the water came from and how long it was there. If the water damage is caused by a one-time event, like a broken pipe, it may be limited to one area. But if the damage is caused by something that keeps happening, like a roof leak, it may be worse and need a full inspection and repair.
Even though these steps can help you figure out how bad the water damage is, you should still talk to a professional if you aren’t sure or if the damage looks bad. A professional can give you a more accurate assessment and advice on how to fix things, making sure that your bathroom roof is safe and sound.
Steps to Get Rid of Water Marks on Your Bathroom Ceiling
Water stains on the roof of a bathroom can look bad and be annoying. But if you do it the right way, you can get rid of them and bring the ceiling back to its former glory. Follow these steps to get rid of water stains and make your bathroom roof look clean and new.

Step 1: Figure out where the water stain came from
Before you try to get rid of a water spot, it’s important to figure out what caused it and fix that. Check for pipe leaks, damage to the roof, or problems with ventilation that could be causing the water stains. Fixing the cause of the problem will stop marks from happening again.
Step 2: Get the workspace ready
Get rid of any furniture or other things in the bathroom that might get in the way of you reaching the roof. During the cleaning process, put down drop cloths or plastic sheets to protect the floor and surfaces from any drips or splatters. Wear goggles, gloves, and a mask to protect yourself from any dirt or cleaning solutions that might be around.
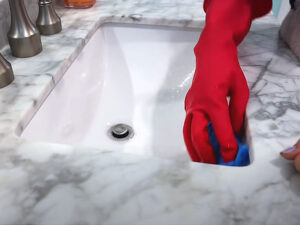
Step 3: Clean up the mess
Start by using a light detergent or cleaning solution to clean the stained area. Follow the directions on the bottle to mix the cleaner with water. Scrub the spot gently in a circle with a sponge or soft cloth. Don’t use harsh cleaners on the ceiling because they can scratch it.
Step 4: Use a primer that blocks stains
If the water stain is still there after you clean it, use a base that blocks stains to keep it from bleeding through the paint. Choose a primer that is made to work with water spots. Use a brush or roller to spread the primer over the damaged area in an even layer. Wait until it’s fully dry to move on.
Paint the ceiling
Once the primer that stops stains has dried, you can paint the ceiling. Choose a high-quality paint that can be used in bathrooms. It should be immune to moisture and mold. Use a brush or roller to spread a thin, even coat of paint over the whole ceiling or just the damaged area. Wait until the paint is fully dry before adding more coats if needed.
Step 6: Check for any other stains
After the paint is dry, check the ceiling for any water spots that might still be there. If there are still spots, repeat the steps of cleaning and priming before painting another coat. Cleaning, priming, and painting may need to be done more than once to fully get rid of stains.
Step 7: Stop water stains from happening again
To keep your bathroom ceiling from getting water stains in the future, take steps to reduce moisture and keep good airflow. Make sure the bathroom heaters or fans work well and use them when you shower and after you shower. Fix any leaks in the pipes right away, and check the roof regularly for damage or leaks.
Step 8: Keep an eye out for mildew and mold
Mold or mildew can sometimes be found where there are water stains. Once the water stains are gone, keep an eye on the bathroom roof for signs of mold growth. If you see black spots or smell mold, you need to fix the problem right away. Talk to a professional if the mold growth looks big or if you’re not sure you can handle it on your own.
Step 9: Think about getting help from a professional
If you’ve tried to get rid of the water stains but haven’t been successful or if the stains are accompanied by a lot of damage to the structure, it might be best to call an expert. Professionals who fix water damage have the skills and tools to examine the situation, make any repairs that are needed, and bring your bathroom ceiling back to its original state.
Step 10: Keep cleaning and checking on a regular basis
Once you’ve gotten rid of the water spots and fixed your bathroom ceiling, it’s important to keep cleaning and checking it regularly. Clean the ceiling every so often with a mix of mild detergent and water to keep dirt and grime from building up. Check the roof often for signs of water damage or stains, and fix any problems right away to stop more damage.
By following these steps and fixing the problem at its source, you can get rid of water spots on your bathroom ceiling and make the room look clean and welcoming. Remember to put safety first and, if you need to, get help from a professional if there is a lot of water damage or mold. With the right care and upkeep, you can have a beautiful bathroom ceiling that doesn’t get stained for many years.
Effective Ways to Clean Up Water Stains That You Can Do Yourself
Water stains on a bathroom roof can be hard to get rid of, but with the right do-it-yourself cleaning products, you can do it yourself and get the job done. Here are some good ways to get rid of water stains and make your bathroom roof look clean again.
Step 1: Mix water and vinegar
Vinegar is a natural and flexible cleaner that can be very good at getting rid of water stains. In a spray bottle, mix equal amounts of white vinegar and water. Spray the solution right on the spot on the ceiling.
Let it sit for a few minutes to soak into the spot, then use a clean cloth or sponge to gently scrub the area in a circular motion. Rinse the sponge or cloth often and keep scrubbing until the stain comes off. The last step is to wipe the area with a clean, damp cloth to get rid of any leftover dirt.
Step 2: Baking Soda Paste
Baking soda is another strong cleaner that can help get rid of stains caused by water. Mix some baking soda with a small amount of water until you get a thick mixture. Spread the paste evenly over the spot that has been damaged. Let it sit for about 15 minutes so that the color can break down.
Then, scrub the area gently with a wet sponge or cloth, working the baking soda paste into the stain. Rinse the sponge or cloth often and keep scrubbing until you get rid of the color. Use a wet cloth to wipe the area clean and get rid of any leftover stuff.
Step 3: Hydrogen Peroxide Solution
Hydrogen peroxide is a strong stain remover that can help get rid of water spots on a bathroom ceiling. In a spray bottle, mix equal parts of hydrogen peroxide and water. Spray the solution on the spot and let it sit for a few minutes. Use a clean cloth or sponge and a light touch to gently scrub the spot. Rinse the sponge or cloth often and keep scrubbing until the stain is gone. Lastly, use a clean, damp cloth to wipe away any extra solution.
Step 4: Make a paste of lemon juice and salt
With its acidic properties, lemon juice can be mixed with salt to make a powerful paste for cleaning water spots. Squeeze the juice of a fresh lemon into a small bowl and add the same amount of salt. Make a paste by mixing the items together. Put the paste right on the spot and spread it around evenly.
Let it sit for about 10 minutes. Then, scrub the area gently with a wet cloth or sponge to work the paste into the stain. Rinse the sponge or cloth often and keep scrubbing until the stain comes off. Use a wet cloth to wipe the area clean and get rid of any leftover stuff.
Step 5: Clean the dishes often with dish soap
Using dish soap to clean your bathroom roof regularly can help keep it clean and free of water stains. In a bucket, mix together a small amount of light dish soap and warm water. Dip a clean cloth or sponge into the soapy water and squeeze out the extra liquid.
Scrub the ceiling gently, paying extra attention to spots that tend to get water stains. Rinse the cloth or sponge often and keep wiping the ceiling until it is completely clean. Lastly, use a clean, damp cloth to wipe the area to get rid of any soapy residue.
Using these effective do-it-yourself cleaning methods, you can get rid of water spots on the ceiling of your bathroom and make it clean again. Test any cleaning product on a small, unnoticeable part of the ceiling first, and be careful when working up high.
How to Keep Your Bathroom Ceiling from Getting Water Stains Again
Having water stains on your bathroom roof can be annoying, but if you take steps to prevent them from happening again, you won’t have to deal with them again. You can keep your bathroom ceiling clean and stain-free by getting to the bottom of the problem and taking steps to stop it from happening again. Here are some things you can do to keep watermarks from coming back:
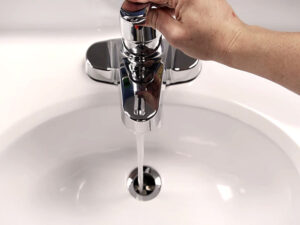
Step 1: Fix any leaks in the pipes
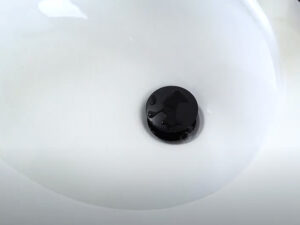
Check for leaks in all plumbing parts, such as faucets, showerheads, and lines. Water spots can be caused by even small drips of water over time. Water can get into the roof if broken parts aren’t fixed or replaced quickly.
Step 2: Make sure the roof is sound
Check the roof over your bathroom for damage or leaks on a regular basis. Water can get into the ceiling through broken shingles, cracks, or holes. Repair or replace any broken parts of the roof right away to stop water stains from showing up.
Step 3: Make sure there is enough airflow
If there isn’t enough air, there can be too much moisture and condensation, which makes it easy for water stains and mold to grow. Install and keep up-to-date air systems, like exhaust fans, in your bathroom to cut down on humidity. Use the airflow system while you’re taking a shower and after you’re done to get rid of the extra moisture in the air.
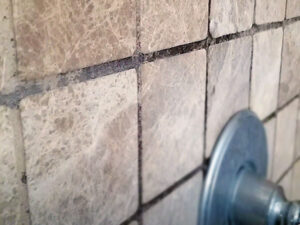
Step 4: Cover the grout and caulk
Check the grout and sealing around the bathtub, shower, and sink in your bathroom on a regular basis. When grout and caulk are cracked or falling apart, water can get into the walls and roof. Caulk and grout should be reapplied or fixed as needed to keep a watertight seal and prevent water stains.
Step 5: Use a paint or primer that is waterproof
You might want to paint or prime your bathroom ceiling so that it won’t get wet. These special items make a barrier against water, so water stains are less likely to happen. Follow the manufacturer’s advice for how to apply the waterproof paint or primer to make sure it covers well and sticks well.
Step 6: Clean and dry water spills right away
Spills of water should be cleaned up and dried as soon as possible. Even small spills can leave spots if they are not cleaned up right away. Use towels or cloths that can soak up water, and dry the area well, so that water doesn’t get into the ceiling.
Step 7: Maintenance and checks on a regular basis
Keep your bathroom in good shape by doing regular upkeep and inspections. Check the ceiling for any signs of water damage, leaks, or stains. Fix any problems right away to avoid more damage and water stains.
Step 8: Check the level of humidity
Watch how much moisture is in the air in your bathroom. Too much humidity can cause water spots and mold to grow. Use a hygrometer to find out how wet it is, and try to keep it below 50%. Use a dehumidifier if you need to get rid of excess wetness in the air.
Step 9: Teach your family members
Teach everyone in the house how to use the bathroom right to avoid problems with water. Encourage them to close bathroom curtains or doors, use bath mats to catch water, and report any leaks or spills right away. Taking all of these precautions will make it much less likely that water stains will come back on your bathroom roof.
By doing these things and taking other precautions, you can keep water stains from coming back on your bathroom roof. To keep a place clean and free of stains, it’s important to do regular upkeep, make repairs quickly, and control moisture.
Final Thoughts
Water stains on a bathroom roof can look bad and be a pain to deal with. But if you follow the steps in this guide, you can get rid of water marks and keep them from happening again. To get rid of water spots, you need to find out where they came from, use the right cleaning products, and fix any underlying problems.
Also, taking preventative steps like fixing leaks, making sure there is enough airflow, and doing regular maintenance can help keep a bathroom ceiling clean and free of stains over time. With these tips, you can make sure that your bathroom is always clean and fresh.