Have you ever wondered how professionals are able to achieve that perfect shellac finish? One of the secrets is that they take great care of their tools, especially their shellac brushes. I absolutely love DIY projects, especially when it comes to woodworking and restoring furniture. One skill that has become incredibly important for me is knowing how to properly clean a shellac brush. It’s a valuable skill that I’ve added to my repertoire.
Using a clean shellac brush not only helps you achieve a smoother application, but it also helps your brush last longer. This can save you both time and money in the future. After trying many different approaches, I’ve finally figured out the best ways to clean shellac brushes. These methods really work and can make your brushes look as good as new every time you use them.
In this blog post, I’ll walk you through the process of cleaning your shellac brush like a pro. Get ready to say goodbye to those annoying clumps and uneven coatings! Say hello to a brush that will always be there for you, keeping your creative journey smooth and hassle-free.
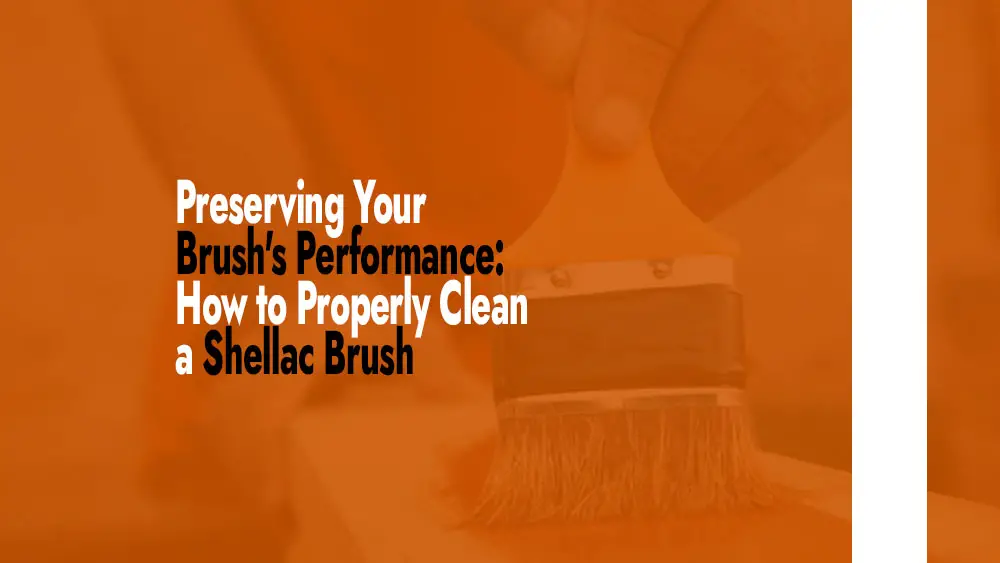
How to Clean Your Shellac Brush for Optimal Woodworking Results
To keep your shellac brush in great shape and make sure it works well for future uses, it’s important to clean it thoroughly. Once shellac, which is a finish made from natural resin, dries on brushes, it can be difficult to remove. If you want to clean a shellac brush and keep it in good condition for future projects, just follow these detailed steps.
Step 1: Make sure you have all the materials you need
Before you start cleaning a shellac brush, it’s important to gather all the materials you’ll need to make sure you have a successful and efficient cleaning session. To start, you’ll want to have denatured alcohol on hand. It’s a strong solvent that works well for dissolving shellac and getting it off your brush bristles.
Also, make sure to have a container that is big enough to hold the brush while you clean it. To make sure the bristles are completely covered in alcohol and get a good cleaning, it’s important to use a container that is suitable for the job.
If you’re having trouble getting rid of stubborn shellac residues from your brush, you can try using a brush comb or a wire brush to help with the process. These tools can be used to remove any dried shellac particles that may have gotten stuck in the bristles. In addition, make sure to have some mild dish soap and warm water ready. These will be important for the final cleaning and rinsing steps of the process.
Finally, make sure you have a soft cleaning cloth or sponge nearby to assist you with the cleaning. Also, keep a clean, dry towel on hand to gently pat the brush dry after you finish cleaning.
Step 2: Remove any excess shellac
It’s important to remove any extra shellac from the bristles of the shellac brush before you start cleaning it. To accomplish this, simply place the brush over a container or waste receptacle and lightly tap it against the side. By tapping, you can remove any shellac particles that may be stuck to the bristles.
When tapping the brush, it’s important to be careful to avoid any forceful impacts that could harm the delicate bristles. If you remove the extra shellac now, it will be easier to clean later and it will stop the shellac from getting even harder on the brush.
Step 3: Rinse the item using denatured alcohol
Now that you’ve taken off the excess shellac that was visible, it’s time to move on to the actual cleaning process. Please pour enough denatured alcohol into the container so that the bristles of the brush are completely submerged. Denatured alcohol is a great choice for cleaning shellac from brushes because it can effectively dissolve the hardened resin, making it much easier to remove.
Dip the brush into the alcohol, ensuring that all the bristles are completely submerged. You should let the brush soak in the alcohol for a few minutes. This will give the solvent enough time to penetrate and dissolve the shellac residues completely. Soaking the shellac will make it softer, which will make it easier to remove when you clean it later.
Step 4: Take a comb and run it through the bristles
Once the brush has been soaking in the denatured alcohol for a few minutes, it’s time to move on to the next step: combing the bristles. It’s important to take this step to make sure you remove any shellac particles that may have stuck to the bristles while applying it. To clean your brush, use a brush comb or wire brush. Begin combing through the bristles gently, starting from the base and moving towards the tips.
Please handle the bristles with care and patience, as they are delicate and can be easily damaged if handled too roughly. When you comb the bristles, it helps to remove any stubborn shellac residues, making sure that the brush is completely clean and ready to be used again in the future.
Step 5: Repeat the alcohol rinse
Now that you’ve finished combing the bristles to remove most of the shellac residues, it’s time to rinse them again with denatured alcohol. It’s important to take this step to make sure that all the shellac is dissolved and removed from the bristles. This will leave the brush clean and ready for more cleaning. Put the brush back in the container with some fresh denatured alcohol. Give it a gentle swirl, making sure the solvent touches all parts of the bristles.
When you use fresh alcohol, it helps to break down any remaining shellac on the bristles, making it easier to clean them. You should let the brush soak in the alcohol for a few more minutes. This will help maximize the cleaning effect of the solvent.
Step 6: Wash the item using a mild dish soap
Now that most of the shellac has been removed by using alcohol rinses, it’s time to proceed to the next step of the cleaning process. Please take out the brush from the denatured alcohol and get ready to make a solution using warm water and a gentle dish soap. Using dish soap will effectively remove any remaining shellac residues and also clean off the alcohol from the brush.
To start, put a small amount of dish soap in your hand. Then, use your fingers to gently massage the soap through the bristles, making sure to cover them completely. Make sure you get the soap all the way down to the bottom of the bristles to make sure you clean them thoroughly. If you mix warm water with dish soap, it will effectively dissolve and remove any leftover shellac, leaving your brush nice and clean.
Step 7: Rinse the brush with water
Now that you’ve washed the brush with soap, it’s time to rinse off any remaining soap, shellac, and alcohol residues. Make sure to rinse the brush under warm running water until all the soap and residues are completely washed away. When you’re rinsing, try gently squeezing and shaping the bristles to help get rid of any leftover debris. It’s really important to thoroughly rinse the brush to make sure it’s completely clean and ready for the final drying step.
Step 8: Gently pat the area dry using a towel
Once you’ve finished rinsing the brush, it’s time to get rid of any extra water. To dry the bristles, use a clean and dry towel. Gently pat them until they are dry. Try to avoid rubbing too hard, as it could cause the bristles to fray and potentially damage them. The objective is to get rid of extra water from the brush without causing any damage to the bristles. To make sure the brush keeps its shape and performs well, it’s best to gently pat it dry.
Step 9: Let the item dry naturally in the air
Now that you’ve finished cleaning and drying the brush, it’s time to let it air dry. You can put the cleaned brush on a flat surface or hang it upside down, making sure that the bristles don’t touch anything. By positioning the bristles in this way, we can ensure that they maintain their shape and avoid any possible contamination from the surrounding environment.
It’s really important to let the brush air dry completely. This helps to make sure that any leftover moisture doesn’t lead to mold or mildew growing in the bristles. When a brush is completely dry, it is ready to be stored and used again in the future.
Step 10: Make sure to store the items correctly
After the shellac brush has fully dried, it’s important to store it correctly so that it stays clean and can be used again. If your brush has a protective cover or sleeve, be sure to use it to keep the bristles safe from dust and other particles. You can also keep the brush in a clean and dry place, away from anything that could potentially make it dirty. To keep your shellac brush in great shape for your future woodworking or finishing projects, it’s important to store it properly.
Step 11: Performing Regular Maintenance
If you want to keep your shellac brush in good shape and make sure it lasts longer and works well, it’s important to do regular maintenance. After you finish using the brush, remember to tap it gently to remove any extra shellac, just like it says in Step 2. To make the cleaning process easier later on, it’s a good idea to follow this simple routine that will keep the shellac from hardening on the bristles. In addition, keeping up with regular maintenance will help ensure that your woodworking and finishing projects consistently produce effective results.
Step 12. Make sure to stay away from harsh solvents
When you’re cleaning or doing regular maintenance, make sure to steer clear of harsh solvents or lacquer thinners. Using these strong chemicals can harm the fragile bristles and affect the overall quality of your shellac brush. Instead, it’s best to use denatured alcohol for cleaning shellac brushes. This type of alcohol is specifically made for this purpose and is gentle on the brush fibers.
To sum it up, cleaning a shellac brush is a meticulous task that demands patience and careful attention to detail. To keep your shellac brush in great shape and make sure it works well for your woodworking and finishing projects, follow these step-by-step instructions and remember to do regular maintenance. This will help your brush last for a long time.
Are There Any Other Ways to Clean Your Shellac Brush?
Although the step-by-step guide I shared earlier gives you a detailed approach to cleaning a shellac brush, there are other methods you can consider trying out. Certain situations or personal preferences may make some of these methods more suitable. In this section, we’ll take a look at a few different methods you can try for cleaning your shellac brush.
Vinegar Soak
You can also try soaking your shellac brush in vinegar as an alternative to using denatured alcohol for cleaning. White vinegar is a great natural cleaner that can effectively remove shellac residues. To get started, find a container that is big enough for the brush and pour in some white vinegar. Make sure to fully immerse the bristles of the brush in the vinegar, making sure they are completely covered.
You should let the brush soak in the vinegar for at least 30 minutes to an hour, depending on how much shellac buildup there is. While the item is soaking, the vinegar will help break down the shellac, which will make it easier to remove when you clean it later on. Once you’ve finished soaking, take the brush out of the vinegar and use a brush comb or wire brush to gently comb through the bristles.
This will help remove any shellac particles that may have softened during the soak. Make sure to rinse the brush really well using warm water. This will help get rid of the vinegar and any leftover shellac residues. If necessary, you can wash the brush using mild dish soap and warm water to make sure it gets cleaned thoroughly. For those who prefer a gentler cleaning solution or want to steer clear of harsh chemicals, this method is a great option.
Hot Water Soak
If the brush has a moderate amount of shellac buildup, you can try soaking it in hot water as an easy and effective cleaning method. To get started, you’ll want to boil some water in a pot. Once the water is boiling, take your brush and gently dip the bristles into the hot water, making sure they are completely submerged.
You should let the brush soak in hot water for a few minutes. This will help soften the shellac by using the heat. When the shellac starts to loosen, it becomes simpler to remove while cleaning. Once you’ve finished soaking, take the brush out of the hot water and carefully use a brush comb or wire brush to gently remove any softened shellac from the bristles.
Make sure to rinse the brush really well with warm water in order to remove any leftover shellac. If you want, you can also wash the brush with some mild dish soap and warm water to give it a more thorough cleaning. If you have brushes with a little bit of shellac buildup, a hot water soak can be a fast and effective solution.
Brush Restorer Solution
If you’re in search of a product that’s made specifically for cleaning shellac brushes, a commercial brush restorer solution can be a great option to consider. Brush restorers are designed to remove dried shellac and other finishes from brushes, making them usable again in the future.
When using a brush restorer solution, it’s important to carefully follow the instructions provided by the manufacturer. Usually, you’ll have to dip the brush into the solution for a certain amount of time to ensure that the restorer can do its job properly. Once you’ve finished soaking, take the brush out of the solution and continue with your usual cleaning routine.
This involves combing the bristles and rinsing them with warm water and mild dish soap. If you’re someone who likes using specific products for cleaning shellac brushes, the brush restorer solution is a great choice. It’s really convenient and designed specifically for that purpose.
Vinegar and Baking Soda
If you mix white vinegar and baking soda together, you can make a homemade cleaning paste. This paste is great for getting rid of shellac residues from brushes. To get started, you’ll want to combine the same amount of white vinegar and baking soda until they form a paste. Take the paste and put it on the bristles of the shellac brush, making sure to cover all areas with the mixture. Allow the toothpaste to remain on the bristles for a few minutes.
This will give the vinegar and baking soda mixture enough time to create a fizzy reaction, which can assist in breaking down the shellac residues. Once the waiting period is over, you can use a brush comb or wire brush to gently comb the bristles and remove any shellac that has softened. Make sure to rinse the brush really well using warm water. This will help to wash away the paste and any shellac residues that may have come loose.
To ensure a thorough cleaning, it’s best to wash the brush with some mild dish soap and warm water after using the baking soda and vinegar treatment. If you’re someone who wants to steer clear of harsh chemicals and prefers using common household ingredients for cleaning, then this natural cleaning paste is a fantastic option.
Vegetable Oil Soak
If you’re having trouble removing hardened residues from your shellac brushes, you can try an alternative method. One option is to soak the bristles in vegetable oil. Using oil can make the shellac softer, which in turn makes it easier to remove when cleaning. To start, place the brush bristles into a container of vegetable oil, ensuring that they are completely submerged.
You can let the brush soak in the oil overnight, which will allow the oil to work on softening the shellac. The following day, use a brush comb or wire brush to gently comb the bristles and remove any shellac that has softened. Make sure to rinse the brush really well using warm water. This will help get rid of the oil and any leftover shellac residues.
To achieve a more thorough clean, it’s a good idea to wash the brush using mild dish soap and warm water. This method is great for brushes that have a lot of shellac buildup. Soaking the brush in oil for a long time helps to loosen the hardened shellac, which makes it easier to clean.
Ultrasonic Cleaners
If you have an ultrasonic cleaner, it can be a great option for cleaning shellac brushes. Ultrasonic cleaners use high-frequency sound waves to generate lots of small bubbles, which then gently and effectively clean the bristles. To use an ultrasonic cleaner, start by filling it with water. Then, place the shellac brush inside the cleaning basket.
Please activate the ultrasonic cleaner and let it run for the recommended amount of time for the cleaning cycle. The ultrasonic vibrations help break down and remove stubborn shellac residues from the bristles. Once the cleaning cycle is finished, take out the brush from the ultrasonic cleaner and make sure to rinse it well using warm water.
This will help to wash away any shellac that may have become loose during the cleaning process. To ensure a thorough cleaning, it’s best to wash the brush with mild dish soap and warm water after using the ultrasonic treatment. If you’re searching for a modern and effective way to clean, an ultrasonic cleaner is a great choice.
Create a Warm Vinegar Steam
Another way you can clean a shellac brush is by using warm vinegar steam. To start, you’ll want to warm up some white vinegar either on the stove or in the microwave. Please be cautious and avoid boiling the vinegar, as it can be dangerous. Place the brush on top of the container of warm vinegar, ensuring that the bristles are in contact with the steam. You should let the brush be exposed to the vinegar steam for a few minutes.
The warmth and vapors from the vinegar will help to soften the shellac residues. Once you’ve finished the vinegar steam treatment, use a brush comb or wire brush to gently comb the bristles and remove any shellac that has been softened. Make sure to rinse the brush really well using warm water. This will help to remove the vinegar and any shellac that may have come loose.
To ensure a more thorough clean, you can follow up by washing the brush with some mild dish soap and warm water. You can try using warm vinegar steam as an alternative method to clean your shellac brush. This method takes advantage of vinegar’s natural properties to dissolve shellac, making it a gentle and effective option.
Just a friendly reminder, it’s important to keep in mind that when you’re experimenting with different cleaning techniques, it’s always a good idea to test them out on a small part of the brush first. This way, you can make sure they won’t cause any harm or negative effects before using them on the entire brush. You can choose the method that works best for you based on your preferences and the resources you have available.
Also Read: How to Clean Cat Teeth Without Brushing
Common Mistakes That You Should Avoid When Cleaning Shellac Brushes
To keep your shellac brushes in top shape and make them last longer, it’s important to clean them regularly. However, many people often make common mistakes when trying to clean these delicate brushes, which can result in damage or a less-than-ideal cleaning outcome. To keep your shellac brushes in great shape and achieve consistent, professional results in your woodworking and finishing projects, it’s important to be aware of these mistakes and avoid them.
Procrastinating the Cleaning Process
One mistake that many people often make when it comes to cleaning shellac brushes is putting off the cleaning process. After you finish applying shellac, you might feel tempted to put the brush aside and clean it later. Shellac, on the other hand, dries pretty fast and can become hard on the bristles of the brush, which can make it a bit difficult to remove later.
If you wait too long to clean the brush, the shellac will become harder to remove and you might need to spend more time and effort to clean it properly. Make sure to clean your shellac brush right after you’re done using it to avoid making this mistake. To prevent the shellac from hardening on the bristles, it’s important to tap the brush and rinse it with denatured alcohol to remove any excess shellac.
Using Improper Cleaning Agents
Another mistake that people often make is using the wrong cleaning products when trying to clean shellac brushes. Sometimes, people use strong solvents or lacquer thinners to clean shellac brushes, believing that these powerful chemicals will make the cleaning faster. However, using aggressive substances can cause damage to the delicate bristles, which can result in fraying and decreased performance over time.
It’s important to make sure you’re using the right cleaning agents for shellac brushes. When it comes to cleaning shellac brushes, using denatured alcohol is the best choice. It does a great job of dissolving shellac without causing any damage to the bristles. To maintain the quality and lifespan of your shellac brush, it’s best to steer clear of harsh chemicals.
Improper Storage
Another mistake that can affect the cleanliness and usability of a shellac brush is improper storage. It’s important to store the brush correctly after cleaning so that dust, dirt, or other contaminants don’t end up on the bristles. If you leave the brush out on a workbench or in an open container, it can damage the bristles and make the brushless clean overall.
To prevent making this mistake, make sure to keep the cleaned brush in a clean and dry place, far from any possible sources of dirt or contaminants. Make sure to use the protective cover or sleeve that came with your shellac brush to keep the bristles safe from dust and debris.
Neglecting Regular Maintenance
One of the biggest mistakes you should definitely avoid is forgetting to regularly maintain your shellac brush. It’s important to do regular maintenance on your brush, even if you clean it after each use, to make sure it works its best. Over time, the bristles of a brush can accumulate shellac residues and other debris, which can impact the brush’s ability to evenly apply the finish.
If you don’t keep up with regular maintenance, your woodworking and finishing projects may not turn out as expected. To avoid making this mistake, make sure to regularly clean your shellac brush thoroughly. To make sure the bristles are really clean, you can use warm water and mild dish soap along with the denatured alcohol for rinsing. Performing regular maintenance on your shellac brush is important to keep it in great shape and ensure it consistently provides professional results.
Using Excessive Force While Cleaning
Another mistake to avoid is using too much force when cleaning the brush. The bristles on a shellac brush are quite delicate, so it’s important to avoid brushing or combing too aggressively to prevent any damage. If you comb or rub the brush too vigorously, it can cause the bristles to fray and make the brush less effective.
To avoid making this mistake, make sure to handle the brush gently while cleaning. When you’re combing the bristles, make sure to use gentle and controlled movements. Avoid applying too much pressure. If you handle the brush gently, it will keep the bristles in good condition and make the brush last longer.
Not Giving Enough Attention to Rinsing
Another common mistake that can impact the cleanliness of a shellac brush is not giving enough attention to rinsing. Once you’ve finished cleaning with denatured alcohol or other cleaning agents, make sure to rinse the brush thoroughly to get rid of any leftover chemicals. If you don’t do this step, you might end up with leftover residue on the bristles, which could affect how well the brush works the next time you use it.
To prevent making this mistake, make sure to thoroughly rinse the brush with warm water until all remnants of the cleaning agent have been completely washed off. To make sure you get a thorough clean, try gently squeezing and shaping the bristles while you rinse.
Using the Brush for Other Finishes or Purposes
Using shellac brushes for other finishes or tasks can be particularly damaging. Shellac brushes are made specifically for applying shellac. If you use them for other finishes or purposes, it can contaminate the bristles and make them less effective. Using a shellac brush for oil-based finishes can cause cross-contamination, which can impact the quality of both the shellac and oil-based finishes.
To prevent making this mistake, make sure you use your shellac brush only for shellac applications. If needed, consider getting separate brushes for other finishes. To get the best results in your woodworking projects, it’s important to use properly labeled and separate brushes for different finishes. This way, each brush can perform at its best and ensure optimal results.
Neglecting to Let the Brush Dry Completely
Another mistake that people often make is not allowing the brush to dry completely after cleaning it. This can result in the growth of mold or mildew. If you leave a shellac brush wet when you store it, it can create a perfect breeding ground for mold and mildew. This can harm the bristles of the brush. To prevent making this mistake, make sure the brush is completely dry before you put it away.
Once you’re done cleaning, gently pat the bristles dry using a clean, dry towel. Then, make sure to let the brush air dry completely. To keep the bristles in good shape and avoid moisture buildup, you can either place the brush on a flat surface or hang it upside down. Once your brushes are completely dry, you can safely store them away for future use.
How Frequently Should You Clean Your Shellac Brushes to Ensure They Perform at their Best?
It’s really important to clean your shellac brushes regularly if you want them to work their best and last a long time. How often you clean your brushes will vary depending on how frequently you use them and the specific type of shellac application you’re working on. It’s generally a good idea to clean your shellac brushes right after you finish using them.
To prevent the shellac from hardening on the bristles, it’s important to tap the brush and rinse it with denatured alcohol to remove any excess shellac. If you clean the brush right away, you’ll stop the shellac from drying and making it harder to remove later. In addition, regular cleaning is important because it prevents shellac residues from accumulating and impacting the brush’s ability to provide smooth and even finishes.
If you use shellac brushes often or for long periods of time, it’s a good idea to do regular maintenance cleaning. Remember to clean them right after each use too. When it comes to routine maintenance, it’s important to give your brushes a good cleaning. This involves using warm water and mild dish soap to wash the bristles and get rid of any stubborn shellac residues.
The frequency of routine maintenance will vary based on how often you use it and how much shellac buildup there is. If you use it a lot, you might need to do routine maintenance once a week or after using it several times. But if you use it less often, you can do maintenance once a month or whenever you feel it’s necessary.
Helpful Tips and Tricks for Prolonging the Lifespan of Your Shellac Brushes
Shellac brushes are important tools for applying a finish made from natural resin. However, because the bristles are delicate, it’s necessary to take good care of them to make sure they work well and last a long time. If you want to keep your shellac brushes in great condition and get professional results in your woodworking and finishing projects, there are a few simple tips and tricks you can use to extend their lifespan.
Clean It Right Away After Using It
To make sure your shellac brushes last longer, it’s important to clean them right away after each use. Shellac dries pretty fast, so if you let it harden on the bristles, it can be harder to clean and might not work as well in the long run. To remove any extra shellac, gently tap the brush to shake it off, and then rinse it with denatured alcohol. This will help prevent the shellac from drying and setting on the brush.
Use the Right Cleaning Products for the Task at Hand
When you clean shellac brushes, it’s best to steer clear of harsh solvents or lacquer thinners. These substances can harm the delicate bristles. You should choose denatured alcohol because it is made specifically for cleaning shellac brushes. It does a great job of dissolving shellac residues without causing any damage to the bristles. To keep your shellac brushes in good condition for a long time, it’s important to use the right cleaning agents.
Regular Maintenance is Important to Keep Things Running Smoothly
To make your shellac brushes last longer, it’s important to not only clean them right after each use but also to regularly maintain them. Over time, the bristles of a brush can collect shellac residues and debris, which can then interfere with the brush’s ability to evenly apply the finish.
To keep your shellac brushes in top shape and maintain their performance, it’s a good idea to give them a thorough cleaning every now and then. Simply use warm water and mild dish soap to clean them. This will help remove any buildup and ensure that they continue to work effectively.
Be Careful When Handling This
To prevent any damage, it’s important to handle shellac brushes with care due to their delicate bristles. When cleaning the brush, it’s best to be gentle and avoid using too much force. Vigorous brushing or combing can cause the bristles to fray. When cleaning the brush, make sure to handle it with care. Use gentle and controlled movements to protect the bristles and keep them in good condition.
Make Sure to Rinse Thoroughly
Make sure to clean the shellac brush with denatured alcohol or other cleaning agents, and then rinse it thoroughly to get rid of any leftover chemicals. If you skip this step, it can result in leaving behind residues that can impact how well the brush performs in future uses. Make sure to rinse the brush thoroughly with warm water until all the cleaning agent is completely washed off.
Proper Storage
It is important to store your shellac brushes properly in order to keep them clean and usable. Once you’re done cleaning, make sure to store the brush in a clean and dry place, away from anything that could potentially contaminate it. If your shellac brush has a protective cover or sleeve, make sure to use it to keep the bristles safe from dust and debris. Taking good care of your storage area will help protect the bristles of your shellac brushes and ensure they are always in good condition for use.
Dedicated Use for Shellac
It is important to use shellac brushes only for shellac applications in order to avoid mixing different substances and maintain their effectiveness. It’s best to avoid using the brushes for anything other than their intended purpose. Using them for other finishes or tasks can cause the bristles to become contaminated and may affect how well they work. If you invest in separate brushes for different finishes, you can make sure that each brush works at its best for its specific job.
Proper Drying
It’s important to make sure the shellac brush is completely dry after cleaning to avoid any mold or mildew from growing. When brushes are damp, they can become a place where harmful substances can grow, which could potentially harm the bristles. Once you’ve finished cleaning, gently pat the bristles dry using a clean, dry towel. Then, make sure to let the brush air dry completely. Once your brushes are completely dry, you can safely store them for later use.
Replace It When It is Necessary
Sometimes, no matter how hard we try to make our shellac brushes last longer, they eventually wear out on their own. Inspecting the bristles regularly will help you figure out when it’s time to replace a brush. When the bristles of your shellac brush become excessively frayed or lose their shape, even with proper care, it’s a sign that you should consider getting a new brush. This will help you maintain high-quality finishes.
Proper Storage Techniques to Keep Your Shellac Brushes in Top Shape
Here are some tips on how to properly store your shellac brushes to keep them in great condition:
Clean and Dry Items Before Storing Them
Make sure your shellac brushes are clean and completely dry before you store them. Over time, any leftover shellac or other finishes on the bristles of a brush can harden and make the brush less effective. Make sure to clean the brush thoroughly after each use. You can use denatured alcohol and warm water with mild dish soap for the cleaning process. You can use a clean towel to gently pat the bristles dry, and then let the brush air dry completely. A dry brush is not as likely to develop mold or mildew and will stay in good shape and perform well.
Use Protective Covers or Sleeves
Make sure to use the protective covers or sleeves that come with your shellac brushes. The purpose of these covers is to keep the bristles clean and protected from dust, dirt, and other things that could make them dirty when the brush is not being used. The covers also play a role in keeping the bristles in good shape and maintaining the brush’s overall condition when it’s not being used. If your brushes don’t have covers, you might want to think about getting brush protectors or keeping them in clean, airtight containers to give them similar protection.
Hold Your Brush Correctly
The way you store your shellac brushes can have a big impact on how long they last. Make sure not to store the brushes in a way that the bristles touch any surface. This can lead to the bristles bending, fraying, or becoming deformed. Instead, you can lay the brushes flat on a clean and dry surface or hang them upside down for storage. If you use hooks or racks made for storing brushes, it keeps the bristles hanging and protected from any possible dirt or other substances.
Separate Brushes for Different Finishes
It is important to prevent cross-contamination with other finishes in order to keep your shellac brushes clean and pure. To ensure the quality of your applications, it’s a good idea to use different brushes for different finishes. This way, you can avoid mixing residues and any potential impact on the final result. To keep your brushes clean and ready for their specific purposes, it’s best to store them separately according to their designated finishes.
Controlled Environment
Make sure to store your shellac brushes in a place where the temperature and humidity are stable, so they don’t get exposed to extreme changes. When the bristles are exposed to extreme heat or cold, it can have a negative effect on them. They may become brittle or lose their shape as a result. In addition, if the humidity is high, it can cause mold or mildew to grow on brushes that are damp. To keep your brushes in good condition, it’s best to store them in a dry and cool place, away from direct sunlight and moisture.
Schedule a Regular Inspection
Make sure to regularly check your stored shellac brushes to ensure they are still in good condition. Please inspect for any indications of mold, mildew, or damage to the bristles. If you see any problems, make sure to take immediate action to clean or fix them. By regularly inspecting your brushes, you can catch any potential issues early on and maintain their overall quality.
Refrain from Using Compression
To prevent the bristles from getting deformed, make sure not to store your shellac brushes in a way that compresses or crowds them. If you keep the brushes squeezed tightly together, it can cause the bristles to bend and become distorted. This can make them less effective when you use them to apply finishes. Make sure to leave sufficient space between each brush so that they can maintain their individual shape and quality.
Periodic Deep Cleaning and Maintenance
It’s important to store your shellac brushes properly, but it’s also equally important to regularly deep clean and maintain them to keep them in great condition. Residues and debris can build up over time, even if you store them properly, which can impact their performance. To keep the bristles clean and free from buildup, it’s important to regularly do a deep cleaning. You can use a mixture of denatured alcohol and warm water, along with some mild dish soap.
If you want to keep your shellac brushes in great condition for a long time, it’s important to use the right storage techniques. This will help maintain their quality and performance. When you store your brushes correctly, they will always give you professional results in your woodworking and finishing projects. This will make your overall creative experience even better.
FAQs
How frequently should I clean my shellac brushes?
It’s best to clean your shellac brushes right after you finish using them. Regularly cleaning your brush prevents the shellac from hardening on the bristles. This makes it easier to remove and keeps the brush in good condition. It’s important to clean your brushes right after using them to avoid any shellac residue buildup. This will ensure that you can consistently and effectively apply shellac in your future projects.
Is it okay to use the same brush for different shellac colors?
It’s generally not a good idea to use the same brush for different shellac colors. When you use shellac brushes, they soak up the finish you’re working with. If you use the same brush for different colors, it can mix them together and impact the quality and consistency of the finishes. To achieve accurate and consistent results, it’s recommended to use separate brushes for each shellac color you work with.
I need help cleaning a shellac brush that has dried with shellac on it. What should I do?
No need to worry if you accidentally let shellac dry on your brush. You can still effectively clean it. To begin, you can make the dried shellac more pliable by soaking the brush in denatured alcohol for a longer duration, like overnight. Using alcohol will assist in dissolving the hardened shellac, which will ultimately make the removal process easier. Once you’ve finished soaking, take a gentle comb and carefully comb through the bristles. Then, proceed with your usual cleaning routine, making sure to thoroughly rinse the brush with warm water and mild dish soap.
Is it possible to clean my shellac brushes using warm or hot water instead of denatured alcohol?
Warm or hot water can be used to rinse the brush after cleaning with denatured alcohol, but it’s not as effective as the solvent in dissolving shellac residues. Denatured alcohol is created with the specific purpose of breaking down shellac, which makes it the preferred choice for cleaning shellac brushes. Just using warm or hot water might not be enough to get rid of hardened shellac, especially if it has been accumulating for a while.
Is it possible to use a hair conditioner or fabric softener to make the bristles of a shellac brush softer?
It is not recommended to use hair conditioner or fabric softener to soften the bristles of a shellac brush. These products are not recommended for cleaning brushes as they may leave behind residues that could affect the application of shellac. It’s best to stick with denatured alcohol when cleaning your brushes. Avoid using household products that aren’t specifically made for taking care of brushes.
Is it safe to clean shellac brushes in a dishwasher or washing machine?
No, it’s not recommended to clean your shellac brushes in a dishwasher or washing machine. Using high temperatures and strong detergents in these machines can potentially harm the delicate bristles and affect the brush’s performance. To properly care for your shellac brushes, it’s best to stick to hand-cleaning methods. You can use denatured alcohol, warm water, and mild dish soap for this purpose.
Can I leave my shellac brush in denatured alcohol for a long time without any issues?
It’s usually okay to let your shellac brush soak in denatured alcohol for a little while to help soften the shellac. However, be careful not to leave it soaking for too long, as that could potentially harm the bristles of the brush. It’s best not to leave the brush in alcohol for too long, especially overnight. Instead, you can limit the soaking time to just a few minutes or as long as necessary to soften the shellac. After that, you can continue with your regular cleaning routine.
Is it possible to clean my shellac brushes using vinegar and baking soda?
Although vinegar and baking soda are commonly used as natural cleaning agents, they may not be the most suitable choice for cleaning shellac brushes. When vinegar and baking soda are mixed together, they create a fizzy reaction. This reaction might not be good for delicate brush bristles if they are exposed to it for a long time. For the best results, it’s recommended to use denatured alcohol or other cleaning agents that are specifically designed for cleaning shellac brushes.
Is it okay to store my shellac brushes in an upright position with the bristles facing upwards?
Storing shellac brushes upright with the bristles facing up is not recommended. If you store the brush in this position, it can cause the bristles to bend or deform, which will affect their shape and performance. To keep the bristles of the shellac brush in good condition and avoid any contamination, it’s recommended to store it either flat on its side or hanging upside down.
When should I consider replacing my shellac brush?
You’ll be able to tell when it’s time to replace your shellac brush because the bristles will start to fray a lot, lose their shape, or not stay stiff anymore. Also, if you notice that no matter how much you clean it, the brush doesn’t work as well as it used to, it might be a good idea to buy a new one. To ensure that you achieve top-notch finishes in your woodworking projects, it’s important to regularly inspect and maintain your shellac brushes. This will help you identify when it’s time to replace them.