Give any room in your house an updated, fresh feel by painting it, but before beginning make sure the ceilings and walls are thoroughly clean before painting commences. If not this step may result in spots and uneven coverage from your paint job.
Cleaning walls and ceilings may seem challenging, but it doesn’t have to be. With the proper tools and know-how at your disposal. It is easy to rid them of dirt, grime, and other buildups over time. Something which is particularly essential if painting over previously painted surfaces or painting them for the first time ever.
I will demonstrate step-by-step how to clean walls and ceilings before painting them. Covering everything you need to know from how to find problem areas to selecting appropriate cleaning products. No matter, if this is your first home improvement project or not, these tips and tricks, will ensure your painting project runs smoothly.
8 Steps to Clean Ceilings And Walls Before Painting
Before beginning to paint the walls and ceilings in your home, it is essential that they are free of dirt, dust, or other waste that might hinder the adhesion of paint. Following are eight steps to help clean surfaces before you paint:

Step 1: Clear Away Dust
To begin your wall and ceiling cleaning endeavor, begin by clearing away any dust that has settled onto them. Dust can make painting harder to adhere well and lead to peeling paint later. Using either a soft-bristled brush or a vacuum with a brush attachment, gently remove dust or cobwebs from surfaces using either soft bristle brushes or vacuum attachments with brush attachments.
Step 2: Make sure your floors and chairs are safe
When cleaning walls and ceilings, care should be taken not to damage floors or furniture. Cover floors with drop cloths or plastic sheets, and move furniture away from walls in order to prevent paint drippings and spills from damaging both. This will keep paint drips from staining them with drips of color that could otherwise stain both.
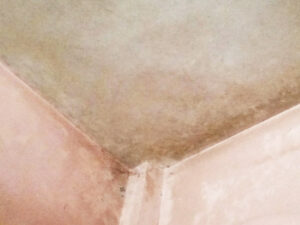
Step 3: Eliminate any marks or spots
Before painting, it is essential that any spots or marks on your walls or ceilings are cleared away. Use a mild soap with warm water and rinse well. For tough spots, you may require stronger cleaners such as stain removers. Please make sure to carefully follow the manufacturer’s instructions, testing any solution on an inconspicuous area first to make sure it will not harm the surface.
Step 4: Fill any cracks or holes
Before painting, it’s essential to fill any holes or cracks in your walls or ceilings with a filler material. Such as spackling compound and joint compound, using a putty knife to smooth out the mixture until dry. After it has fully set up, use fine-grit sandpaper to smooth and even out its surface.
Step 5: Conduct an exterior clean
After cleaning off any spots, marks, or flaws, it’s time to wash the walls and ceilings with a mild soap mixed with warm water, followed by rinsing. Be sure to use a soft sponge or cloth so your surface won’t become damaged while using multiple sections, so detergent doesn’t dry on its surface too quickly. If cleaning a large area is involved, divide it into segments so detergent doesn’t dry overly quickly on each segment.
Step 6: Rinse and dry the surface before proceeding
As soon as you’ve finished washing your surfaces, it is crucial that they are rinsed well with clean water using a soft cloth or sponge, and dried with another dry cloth or towel so as to rid yourself of any soap residue left behind from washing. Make sure the surface is completely dry so any moisture doesn’t interfere with the paint sticking properly.
Step 7: Sand the Surface
After cleansing and drying surfaces, it’s important to lightly sand them so that the paint adheres evenly across their surface. Use fine-grit sandpaper when lightly sanding with care not to damage or over-sand it. Additionally, sanding helps get rid of gloss or sheen left from previous paint jobs, making adhesion easier with new coats of paint.
Step 8: Use a base coat
It is crucial to prepare a surface for painting with a base coat of primer first. A primer helps seal off pores in the surface and gives the paint something smooth and even to adhere to, while also keeping spots and flaws from showing through your paint job. Ensure the primer you choose works with your chosen paint, and apply it according to its manufacturer’s directions for application.
As stated before, prepping walls and ceilings before painting is an integral step you shouldn’t skip. By following the eight tips outlined here, your surfaces will be clean, smooth, and ready for painting. Helping your paint adhere better, last longer, and give a beautiful finish you’re proud to show off. Taking time and care preparing surfaces before starting will save both time and money over time while making sure that your job looks its best!
Can I use any type of cleaning solution to clean my walls and ceilings before painting?
No, not all cleaning products can be used to prep walls and ceilings before painting them. Selecting an ineffective cleaner could damage surfaces and make it harder for the paint to adhere to. So be sure to choose an approachable cleaning product tailored specifically for the task at hand.
A mild detergent mixed with warm water will often suffice when cleaning painted walls and ceilings. But for oily or greasy surfaces you might require stronger cleaners, such as degreasers or area-specific solutions designed specifically to target them.
Before using any cleaning solution to cleanse an entire surface, it’s a good idea to conduct a small test run on an inconspicuous part. This will enable you to determine if the solution is safe for the surface, as well as provide insights into its efficacy and intended results.
Typically when selecting and applying cleaning solutions it is wise to abide by the instructions on the bottle. Choose one suited for the type of area being cleaned. This will help ensure your surface is free from dust or other pollutants and ready to be painted over.
Can I use a power washer to clean my walls and ceilings before painting?
Power washers may not always be the ideal way to prepare walls and ceilings for painting. As they tend to focus more on cleaning things such as siding, decks, and walkways on the outside than on internal areas like walls and ceilings. Their high-pressure water streams could potentially damage any surfaces inside, such as walls and ceilings that may need attention before painting begins.
Power washers can damage walls and ceilings when used for indoor cleaning, seeping water into them to deteriorate drywall or plaster. Possibly remove paint or wallpaper, leaving uneven surfaces that require further sanding or fixes.
Instead of resorting to harsh power washing methods, preferring more gentle approaches like hand-washing with warm water and light soap. Such as using sponges – is recommended as this will allow for greater surface cleaning without creating additional damage, or making new paint adhere less well.
If your walls or ceilings are particularly dirty or damaged, a stronger cleaning solution may be needed to get them cleaned again. Just be sure to test a small area first to make sure it won’t harm or discolor them in any way.
As a general rule, when cleaning walls and ceilings you should take great care to avoid doing any damage that might compromise the paint job in the end.
Should I rinse or wash surfaces after using cleaning products?
Yes, after using a cleaning product to clean surfaces you must thoroughly rinse them in order to eliminate cleaning product residue. It could prevent paint from adhering properly and lead to uneven or blotchy finishes.
After using a cleaning product to cleanse a surface, be sure to thoroughly rinse it with clean water and use either a sponge or cloth. Wipe away any cleaning solution left on the surface to ensure it is absolutely clean.
Before painting, make sure the surface is completely dry. Any moisture left behind could lead to bubbling or peeling in your paint job as well as alter the finish overall.
Rinsing requires using a separate bucket of water from where the cleaning solution came from. Doing this ensures you won’t unintentionally spread dirt and grime back onto your surfaces after having just cleaned them! Furthermore, using a separate cloth or sponge for this step will ensure no accidental dust accumulation happens again.
Final Thoughts
Before painting, it’s essential that your walls and ceilings are clean. Don’t neglect this step – follow proper steps using tools and cleaning products. It will result in walls and ceilings that are smooth, clean, and ready for paint application, saving both time and money with an improved end product. By taking time and care when prepping surfaces before beginning your job, whether painting one room in your house or an entire building it is essential that walls and ceilings receive their due.