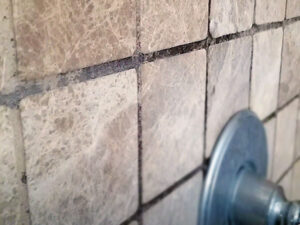
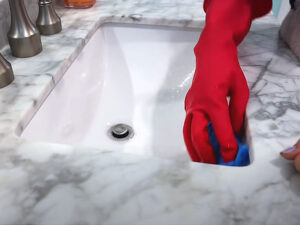
Are you sick of looking at the dirty, brown grout lines on the floor of your bathroom? Do you ever wonder how to make your bathroom look as clean and shiny as it did when you first moved in? Well, you’re in luck because I’ve been there too, and I’ve learned some great ways to clean the grout between bathroom floor tiles.
It might seem hard to clean the grout but trust me, it’s not as hard as it looks. With a little time and the right tools, you can get your bathroom floor back to how it looked when it was new.
In this blog post, I’ll show you step-by-step how to clean the grout between your bathroom floor tiles. I’ll share my personal experiences and tips on how to get a clean and healthy bathroom floor, from getting the right tools to using natural and store-bought cleaning products.
Steps to Clean the Grout Between Bathroom Floor Tiles
Cleaning the grout between bathroom floor tiles can be hard, but with the right plan and the steps below, you can get a floor that looks clean and new. Here’s how to clean the grout between your bathroom floor tiles well:

Step 1: Get your stuff together
Before you start cleaning the grout between your bathroom floor tiles, make sure you have everything you need. You’ll need a brush with firm bristles to scrub the grout well, an old toothbrush to get into tight spots, a bucket to hold your cleaning solution, warm water for rinsing, baking soda, vinegar, hydrogen peroxide, a spray bottle for easy application, and a clean cloth or mop to wipe away the residue.
Step 2: Get the area ready
Remove any bath mats, rugs, or other items from the bathroom floor to make cleaning it easy. This will make it easy to get to the grout lines and clean them thoroughly.
Step 3: Sweep or Vacuum
Before cleaning the grout, sweep or vacuum the bathroom floor to get rid of loose dirt, dust, and debris. This first step keeps these small pieces from moving around and getting in the way of the cleaning process.
Step 4: Make a solution to clean with
In a small bowl, mix baking soda and water together to make a thick paste. Baking soda is a soft abrasive that can be used in a lot of different ways. It works well to get dirt and grime out of grout lines without damaging them.
Step 5: Put the paste on it
Put a lot of the baking soda paste on the grout lines with the stiff-bristled brush or an old toothbrush. Make sure to cover all of the grout’s surface by pushing the paste into the lines in a circle.
Step 6: Spray with a solution of vinegar
Fill a spray bottle with vinegar and water in equal parts. Vinegar is a natural way to clean and kill bacteria. It is also a weak acid that helps break down stains and kill germs. Spraying the vinegar solution on the baking soda paste will cause it to foam.
Step 7: Scrub the grout
Now is the time to put in some hard work. Use the brush to scrub hard along the grout lines. Use hard pressure and focus on spots that are stained or have mildew. Switch to the old toothbrush for tighter areas. This will give you better access and more control.
Step 8: Rinse with warm water
Fill a bucket with warm water and scrub the grout lines with a clean cloth or mop. This step is important for getting rid of any baking soda and vinegar that is still on the floor and leaving a clean surface.
Step 9: Put some hydrogen peroxide on it
If there are any stains or mildew that won’t go away, apply hydrogen peroxide straight to the grout lines that need it. Let it sit for a few minutes so that the bleaching and disinfecting qualities of the peroxide can do their thing. Then, scrub the grout again with the brush or toothbrush.
Step 10: Final Rinse
After you’ve taken care of all the spots, give the grout lines one last rinse. Use warm water and a clean cloth or mop to get rid of any cleaning solution or dust that is still on the floor. Rinse well until the water comes out clear.
Step 11: Wipe the floor dry
To finish, you’ll need to dry the bathroom floor. You can use a clean towel to soak up the water or just let the floor dry on its own. Before going on the floor, you must make sure it is completely dry to avoid slips and falls.
Congratulations! By following these thorough steps, you were able to clean the grout between the tiles on your bathroom floor. Take a moment to look at how well the grout lines were fixed and enjoy how clean and fresh your bathroom feels. To keep your grout clean and make it last longer, you should do this cleaning process often, which will stop dirt and grime from building up.
What is the Best Way to Clean the Dirt Between Bathroom Floor Tiles?
There are different ways to clean the grout between floor tiles in the bathroom. But the best way to clean depends on how dirty and stained the grout lines are. Here are some useful techniques to consider:
1. Baking Soda Paste
Mix baking soda and water to make a thick dough. Put the paste in the spaces between the tiles and let it sit for about 15 minutes. Then, use a brush with stiff bristles or an old toothbrush to scrub the grout. Baking soda is a natural abrasive that helps clean the grout by removing dirt and marks.
2. Solution with Vinegar
Fill a spray bottle with water and white vinegar in equal amounts. Spray the solution on the grout lines and let it sit for a few minutes so the acidic qualities of the vinegar can break up the dirt. Use a brush or toothbrush to scrub the grout lines, then rinse with warm water.
3. Hydrogen Peroxide
Hydrogen peroxide can be used to get rid of tougher spots or mildew that won’t go away. Just put it right on the grout lines and let it sit for 10 to 15 minutes. Then, use a brush or toothbrush to scrub the grout. Rinse well with warm water to get rid of any leftovers.
4. Bleach with oxygen
The grout lines can be cleaned well with oxygenated bleach. Follow the directions on the package and add water to dilute it. Apply the solution to the grout lines and let it sit for as long as the instructions say. Use a brush or toothbrush to scrub the grout, and then rinse it well.
5. Cleaning by steam
Steam cleaners are great for cleaning grout lines in a deep way. The steam’s high temperature and pressure make it good at getting rid of dirt and grime. Move the steam sprayer slowly along the surface as you point it at the grout lines. After that, wipe away any dirt or dust that got loose.
6. Grout cleaners for sale
There are a lot of items on the market that can be used to clean grout. If you want the best results, follow the directions on the package. Some cleaners need to be mixed with water, while others can be put on the grout lines as is. Always test a small area first to make sure that your tiles can handle it.
No matter which way you use, you must scrub the grout lines well with a brush with stiff bristles or an old toothbrush. Use firm pressure and circular motions to get the dirt and spots off well. Rinse the grout lines with warm water to get rid of any cleaning solution dust left behind.
To keep your grout clean, you should sweep or mop the bathroom floor often so that dirt and other debris don’t get stuck in the grout lines. Also, think about using a grout sealer to keep the grout from getting stained or discolored in the future.
Should the Grout be Sealed After It has been Cleaned?
Sealing the grout after cleaning it is a great way to keep it clean and protect it from spots and damage in the future. Because grout is porous, it can soak up liquids, dirt, and grime over time. Sealing makes a barrier on the top of the grout that keeps liquids and stains from getting into the grout lines. This makes it easier to clean.
Here are a few reasons why it is important to protect grout:
Stain Prevention: Stains can be avoided because grout that has been sealed is less likely to soak up liquids like water, soap, or spilled substances that can cause stains. Sealing helps these things stay away and keeps them from getting into the grout, which makes it easier to clean and keep up.
Easier to clean: Grout that has been sealed is smoother and less likely to hold dirt and grime. This makes regular cleaning work better and makes it so you don’t have to scrub as much to keep the grout lines looking clean.
Length of life: Sealing the grout protects it from wear and tear, which makes it last longer. It keeps the grout from cracking, chipping, or breaking down because of water and normal use.
Hygiene: When the grout is sealed, bacteria, mold, and mildew are less likely to grow in it. This makes your bathroom healthier and cleaner.
When it comes to choosing a grout sealer, you have a few choices, such as penetrating sealers or surface sealers. Penetrating sealers get into the grout and protect it for a long time without changing how it looks. Surface sealers add a protective coat to the surface of the grout and can make it look shiny or matte.
When putting on and reapplying grout sealer, it’s important to follow the directions from the manufacturer. How often you need to reseal depends on things like the type of grout, how often people walk on it, and how often it gets wet. As a general rule, the grout should be resealed every one to three years or as directed by the sealer’s maker.
By fixing your grout after cleaning it, you’ll not only keep its look but also make sure it lasts and make it much easier to clean in the future.
Final Thoughts
In the end, cleaning the grout between bathroom floor tiles doesn’t have to be hard. With the right tools and a little bit of work, you can get your grout lines to look as clean and shiny as they did when you first put them in. Whether you use natural cleaning methods like baking soda and vinegar or store-bought products, the key is to scrub the grout lines well and rinse them well.
Also, think about sealing the grout after cleaning it to protect it from spots and damage for a long time. By following these steps and doing regular upkeep, you can have a bathroom floor that is spotless and has beautiful grout lines. Say goodbye to dirty tiles and hello to a clean bathroom that sparkles.


